PollUnit Help
What can i do with PollUnit
With PollUnit you can create online polls and tables, as well as distribute tasks. Participation is also possible without registration.
Create voting
PollUnit was designed to easily make decisions in groups. We offer different methods for decision making. You can combine these methods and functions freely and create polls, todo lists, prioritizations and much more and adapt them to your needs.
PollUnit works like this:
- Create a PollUnit and choose what to vote on
- Send the link to your PollUnit to all participants
- Give your attendees time to vote
- Send the result of your PollUnit to all participants
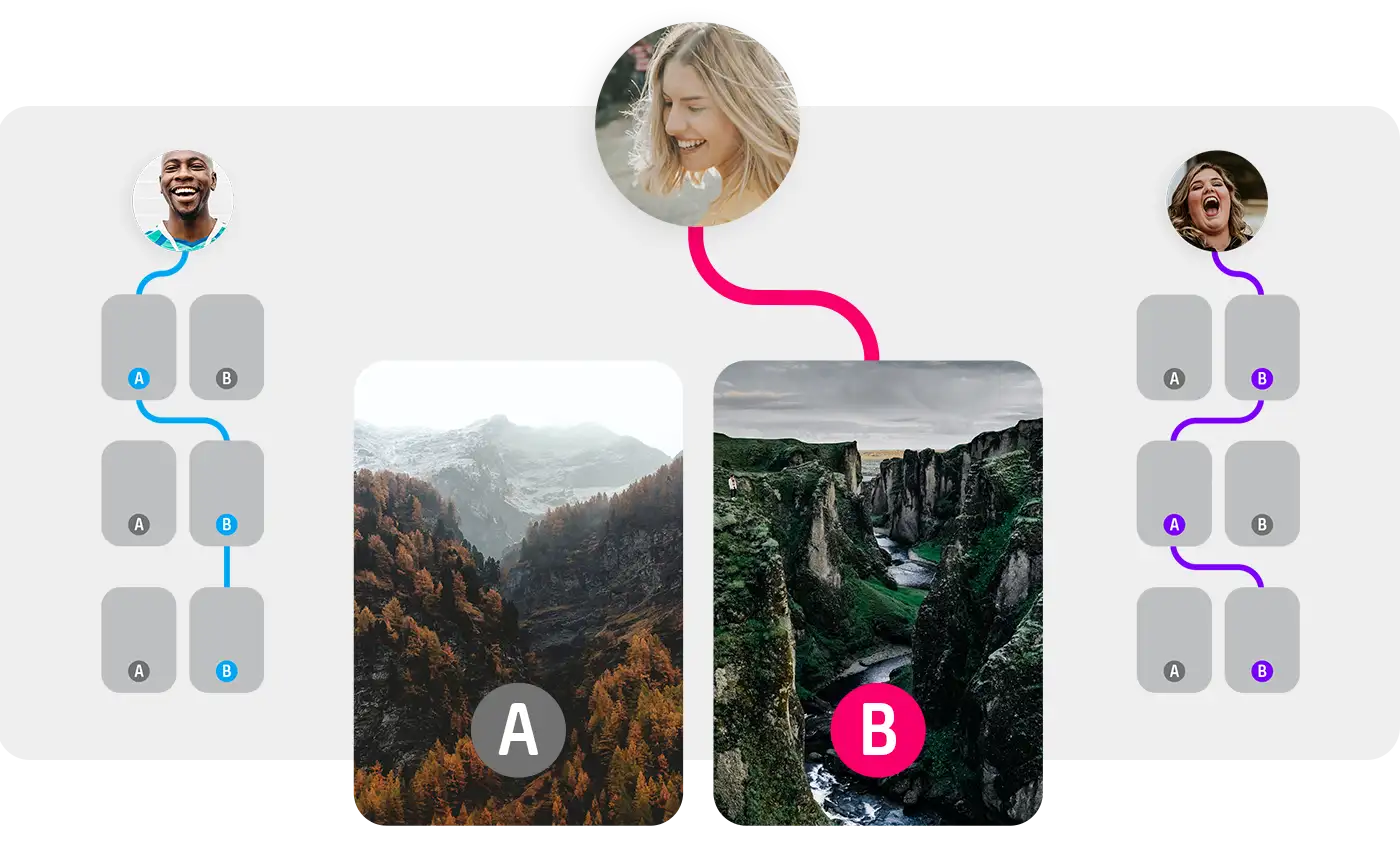
Pairwise comparison
In pairwise comparison, each option is systematically compared with every other option to determine relative preferences or rankings. The PollUnit pairwise comparison method can be used for A-B tests as well as for voting on any texts and images.
To determine the ranking of individual options, the »Elo Number« is used. This is calculated using the »Elo Ranking« evaluation system, which was originally developed for measuring the playing strength of chess players.
Rounds
Define the number of rounds in which each participant is allowed to vote. In each round, you can vote on two random options. Each option can also be compared multiple times with a random different option.
K-Factor
The K-Factor determines how much the Elo number of an option changes after a round. A higher K-Factor means that the Elo number changes more after each round. This allows you to adjust the sensitivity of the ranking. At PollUnit we use a K-Factor of 24.
Quick Question
The quick question is ideal when you want to get spontaneous feedback, a quick opinion or a short vote. Your participants can answer with just one click, and you see the results immediately. In addition to a tendency between two options, the answers can also be single choice or multiple choice.

Organize a photo contest
A PollUnit photo contest is an online gallery with large thumbnails and the possibility to vote - on demand also with photo uploader to collect the work of others.

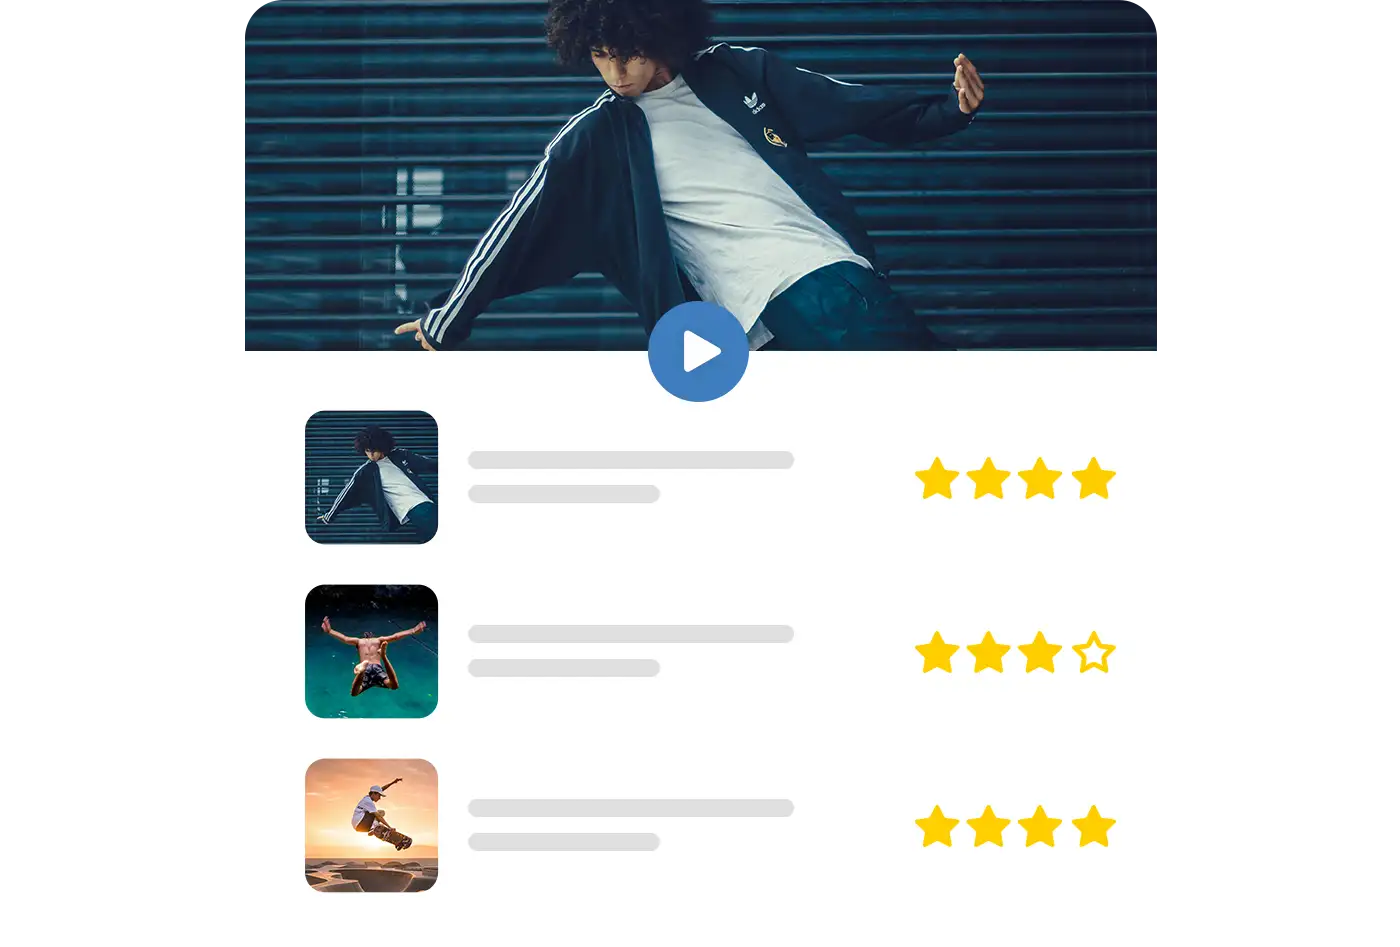
Create a video contest
Voting on videos from streaming platforms like YouTube or on uploaded video files.
YouTube ID
The YouTube ID is a string that uniquely identifies the video on YouTube. You can find this number on YouTube in the »Share« dialog at the end of the URL. Alternatively, you can insert the YouTube link and we will extract the YouTube ID for you.
Vimeo ID
The Vimeo ID is a string that uniquely identifies the video on Vimeo. You can find this number on Vimeo in the »Share« dialog at the end of the URL. Alternatively, you can insert the Vimeo link and we will extract the Vimeo ID for you.
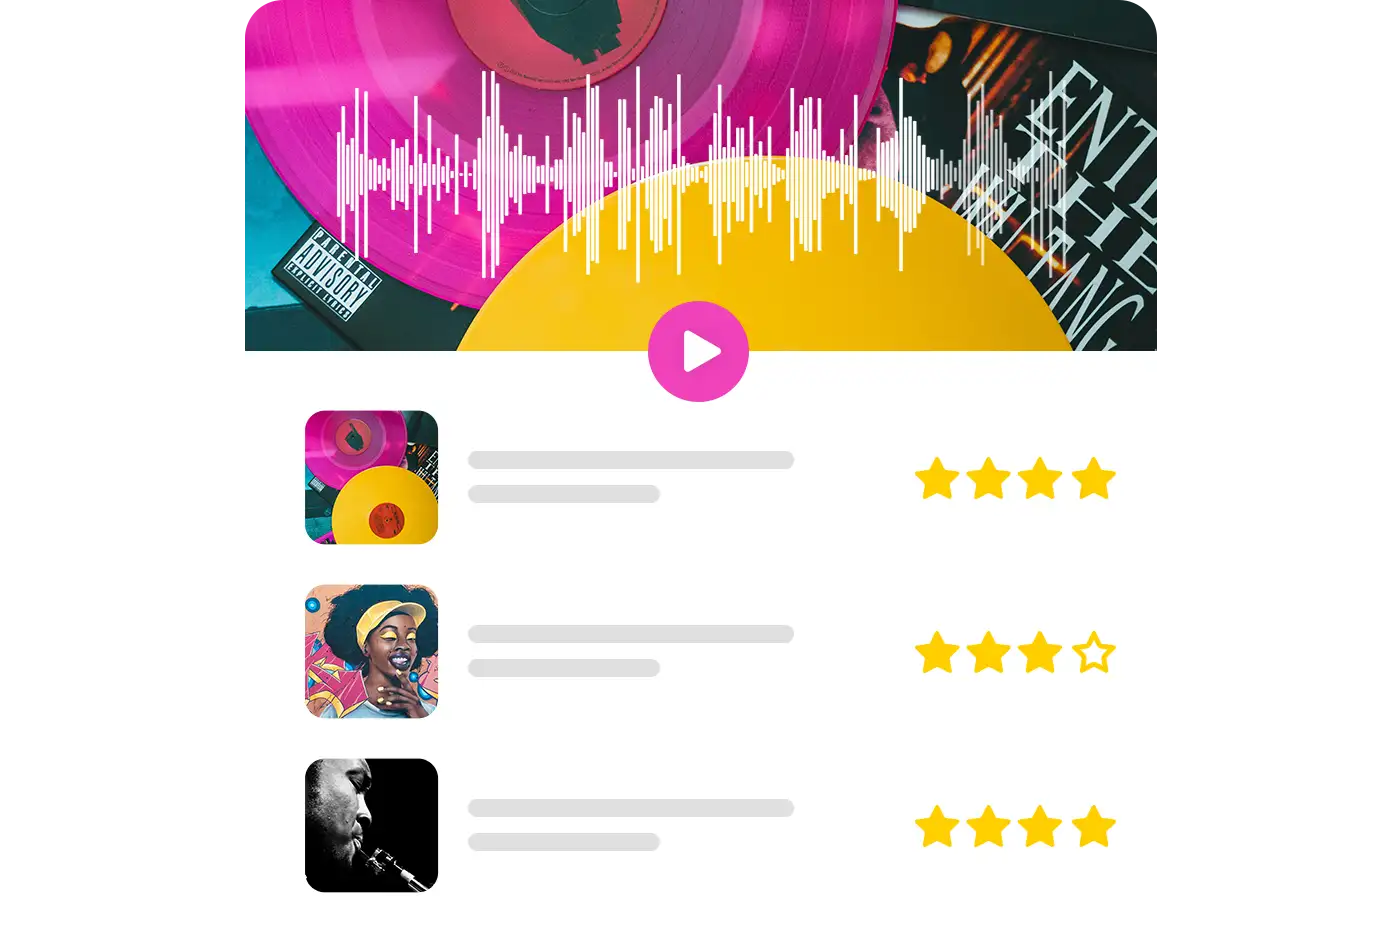
Audio contest
A PollUnit music contest is an online playlist with the possibility to vote and a uploader for Participants.
Create a survey with several questions
Create your online questionnaire in just a few steps. Conduct the survey with the help of form fields and ratings. Several analysis functions help you to better understand and export the results.
Advanced branching logic
Customize your survey behaviour depending on the answers someone provides. Each branching logic consists of a condition or a set of conditions and a logic type. This way you can for example show a survey step only for a specific user group. Learn more in our Tutorial.
The logic types have different precedences: for instance when a »Forward to thank you page« condition is met, the other conditions are not considered. The precedence order is the following: Forward to thank you page > Show > Skip
To test your logics you need to visit the participant link. The admin link will show all steps.
Show
Shows steps only when a condition is met.
Skip
Skips steps when a condition is met.
Forward to thank you page
Forward user directly to the »thank you page« when a condition is met.
Draw
Allow your users to draw, paint or sign directly in your survey.
Collect ideas
With PollUnit you can also collect and rate ideas. Participants can add their ideas with a title and a description. Then all participants can rate and comment on these ideas. This method is ideal for brainstorming. From the best ideas you can also create a vote to find out the best idea.
Free Table
Create a collaborative table where all participants can jointly edit any row, column, or cell in real time. A Free Table offers maximum flexibility.
Participant Table
Create a table to collect information from participants. Participants can enter their data in a single, designated row. The Participant Table is perfect for lists such as potlucks or orders.
Event- / Advent Calendar
Create a personalized online Advent calendar to make the pre-Christmas season special for friends, family, or colleagues with daily digital surprises. Additionally, you can design creative event calendars for various occasions.
Landing Page
A PollUnit landing page is a very simple homepage. You can add texts, images and videos. You can link other PollUnits to a landing page. All linked PollUnits appear on the landing page and are published with only one link.
For example, different photo contests can be created and displayed as categories on a landing page.
Create a PollUnit
With the PollUnit Wizard you can create a voting, photo contest, survey, bring list or prioritization in a few simple steps.
To enter the wizard for creating a PollUnit, click on »Create PollUnit« and select the desired PollUnit type.
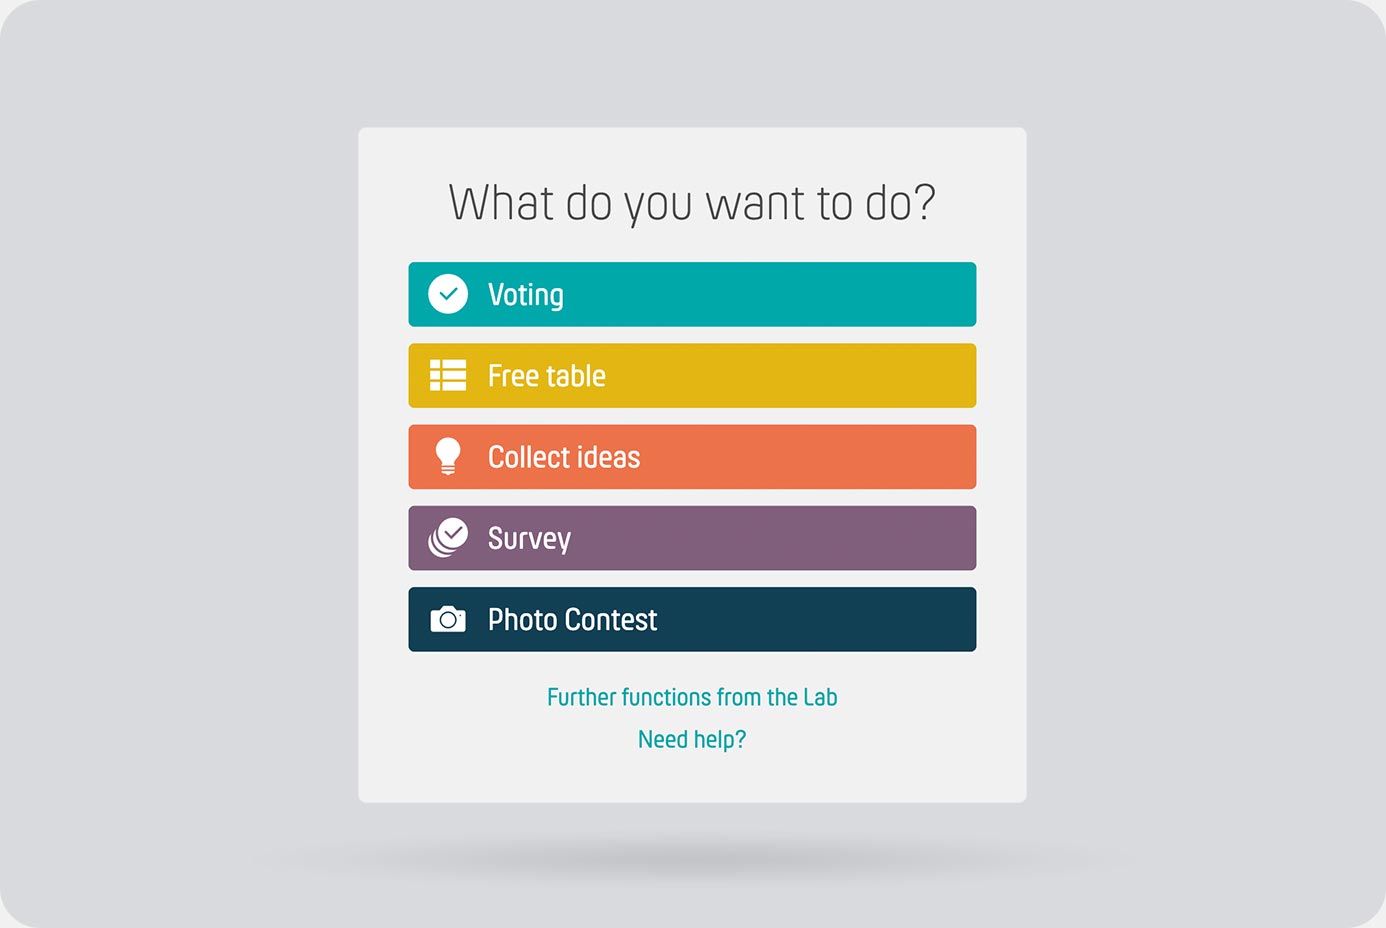
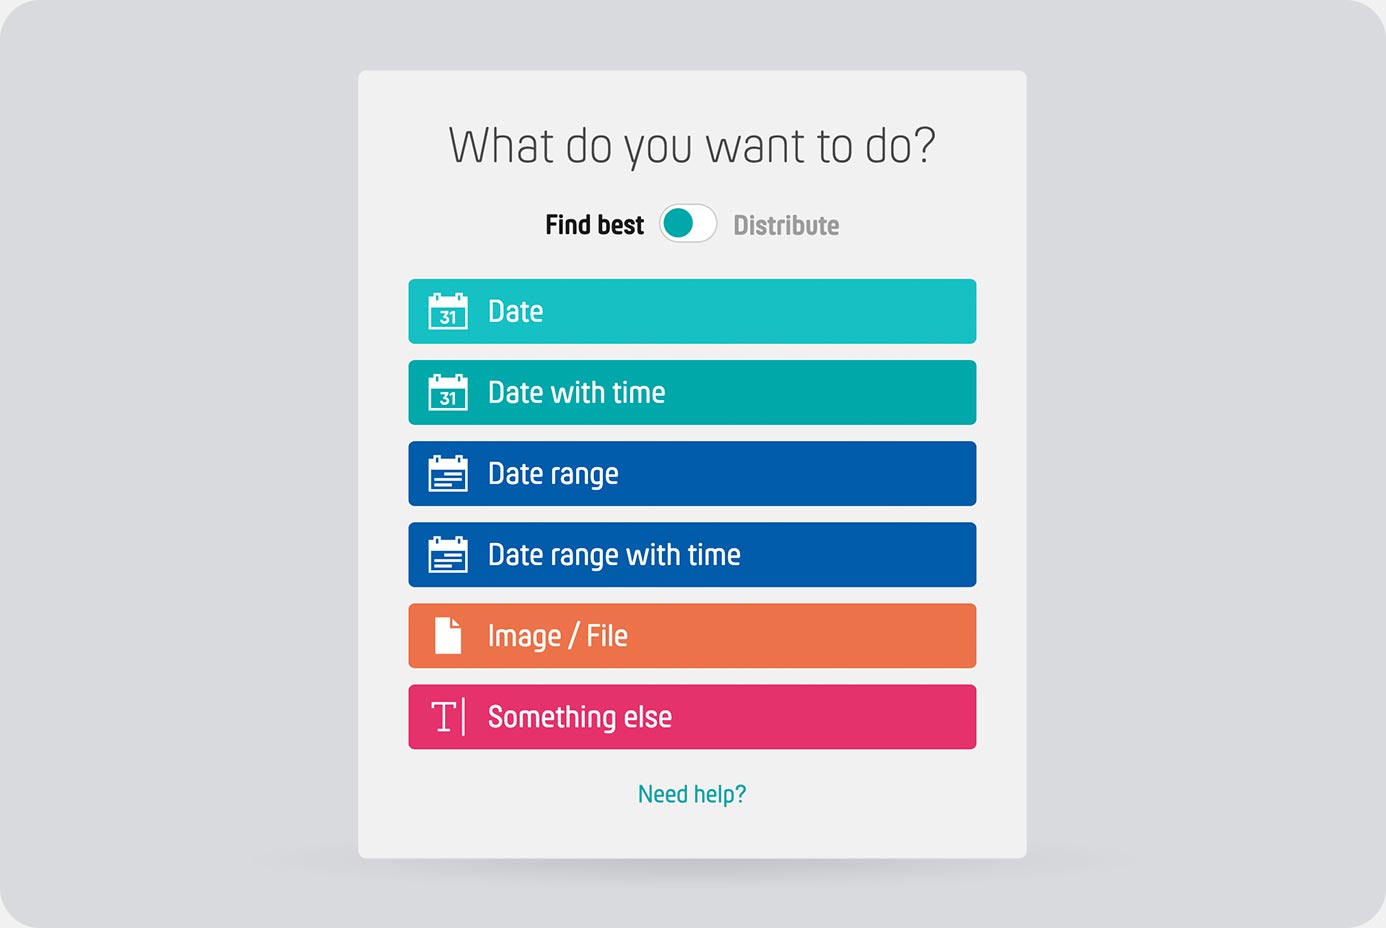
Choose a voting type
If you create a PollUnit with the type "Voting", you must first choose what to vote on. First you have to decide whether you are looking for the best option, i.e. the option with the most votes, or whether you want to divide the options automatically among your voters. Then click on the option type (e.g. date) to start the voting wizard.
Wizard - Basic settings
In the basic settings you determine the title of your PollUnit, the target and voting type of the poll. You can also add a description and location to your poll.
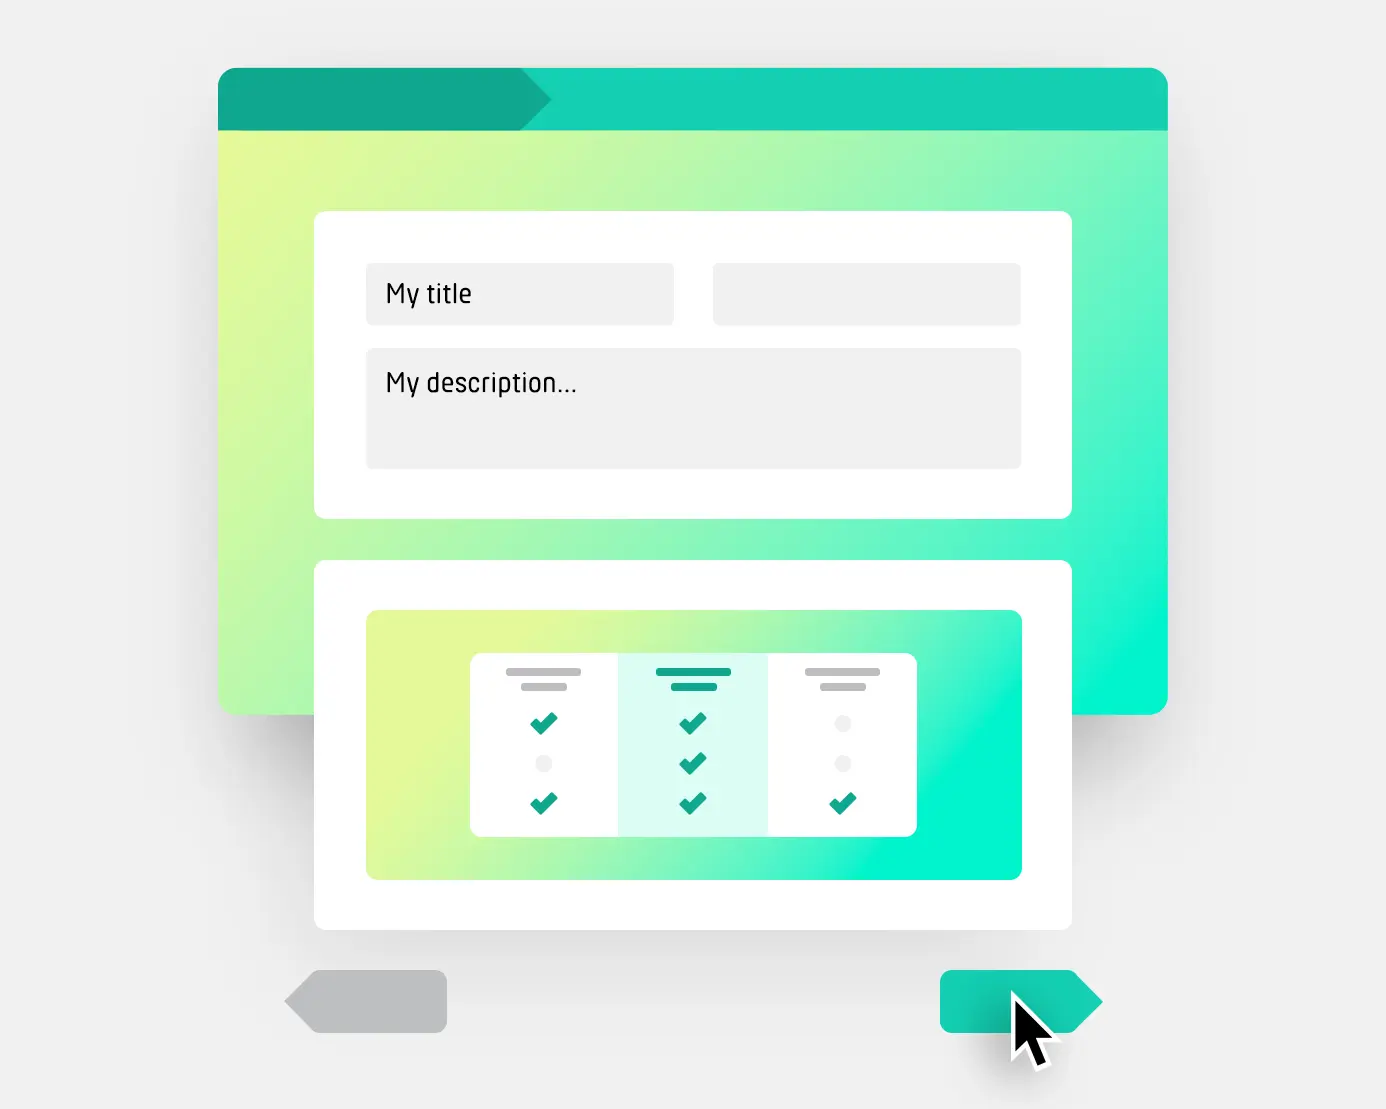
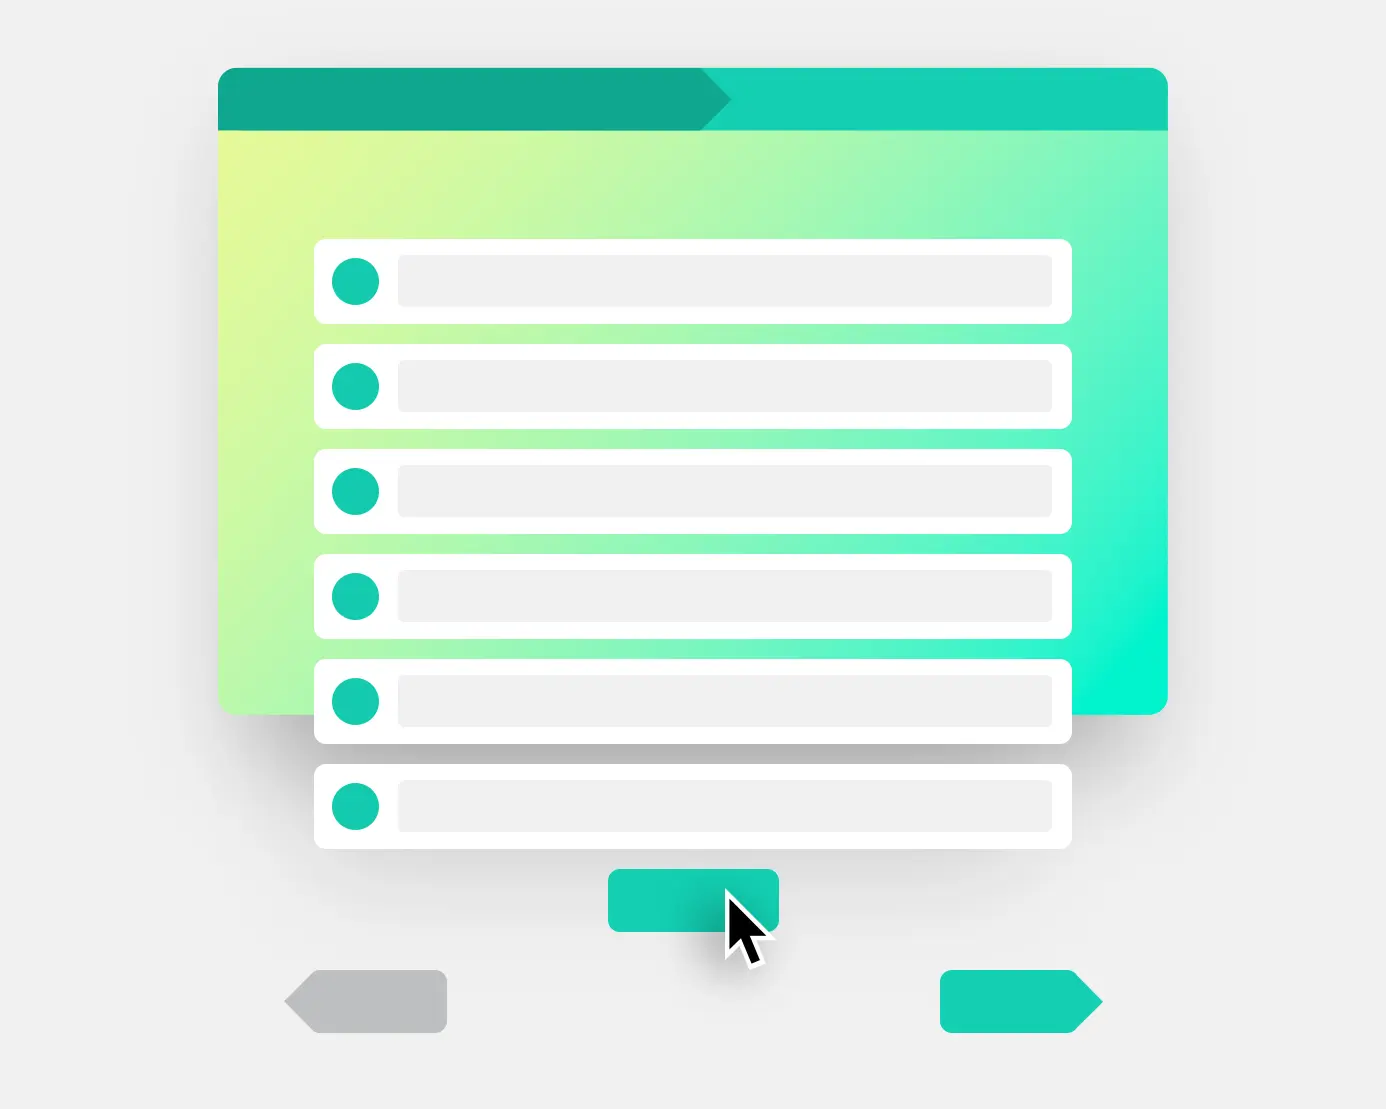
Wizard - Options
In all PollUnit types except the collection of ideas, you can add depending on the type options, photos or texts in a second step.
In Wizard Step »Advanced« you can enable your participants to add their own options.
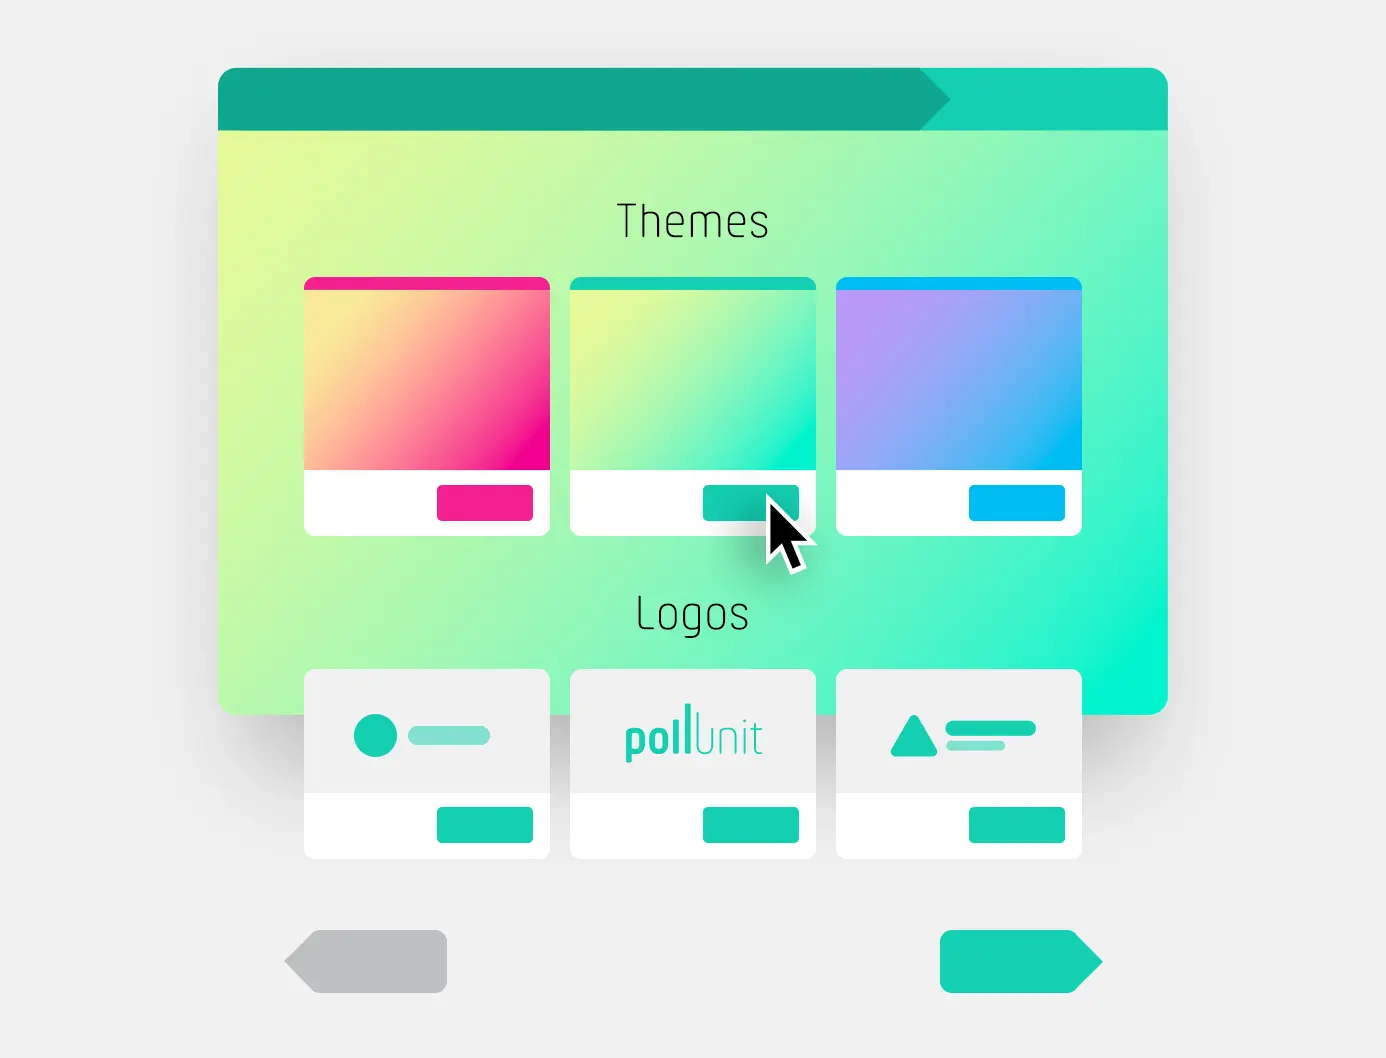
Wizard - Design
In the design step you can customize your PollUnit. You can choose from several ready-made themes. In addition, you have various effects available such as snow or fireflies.
As a premium user, you can also create your own design and as a business user you can upload your own logos and use them in your PollUnit.
Wizard - Advanced
In the advanced settings you can activate various functions. Please refer to the section »Advanced settings«.
Invitations
You can invite people directly in you PollUnit. You can inform your users in 4 different ways.
Invite groups and teams und Teams
You can invite whole groups to your PollUnits. You can manage these groups on the »My groups« page. To add a group to your PollUnit you have to check the corresponding group. You can find more information here in the section »My Account«.
Invite users via email
You can automatically invite your user via PollUnit by entering their e-mail addresses. You can give PollUnit access to your Google Contacts; this simplifies the input of the e-mail addresses.
Share participant link
The participant link is an encrypted link. This link gives your users access to your PollUnit. You can share this link by e-mail and messenger of choice or post it on your homepage.
Share admin link
The admin link works like the participant link with one important difference. With the admin link the user gets basic permission to edit your PollUnit. To use all functions of a PollUnit together, you can also create an organization.
Share a PollUnit via WhatsApp, Facebook...
With a click on the appropriate provider such as WhatsApp, Facebook or Twitter, you can share the participant link.
Option types
Option types are available in PollUnit votings, in pairwise comparisons, as well as in the survey step »Submit rating«. The option type determines what is voted on. Not all option types are available for pairwise comparisons.
Freetext
Voting on freely selectable texts. Ideal for staff lists, brainstorming and anything that can be expressed in words.
Images / Files
Voting on pictures incl. Gallery or files. This type of option allows you and your participants to upload and rate images or files.
Date
Vote for a date. Ideal for finding appointments for a full day.
Date with time
Vote on a date. Ideal for appointments.
Date range
Voting on date periods. Ideal for appointments over several days.
Time range
Voting on time periods.
Poll target
You can choose between 3 different poll targets. The setting can be found in the wizard step 1 (PollUnit) in the schema settings for advanced users.
Find best option
The option with the most votes is the best option. Choose this, if for instance you want to find a common appointment.
Best distribution of options
If possible, the options are distributed among the voters in such a way that each person gets the option they like.
Choose this option if you want to create a roster, for example: There are several dates to choose from and each person should get one.
Lowest resistance
The option with the greatest acceptance in a group is sought here. Your voters can cast votes of opposition. The options with the least opposition win.
Vote types
You can choose between several vote types. This option determines how your voters can rate options.
You will find the setting option in Wizard Step 1 (PollUnit).
Yes / No
Voting with Yes, No and abstain. Negative votes are subtracted from positive votes.
Yes
Simple upvoting. Only positive votes are counted.
Upvote with like button
Simple voting by liking with thumb up symbol. With the target »Lowest resistance« the thumb up becomes a thumb down symbol.
Upvote with hearts
Simple voting with heart symbol. With the target »Lowest resistance« the heart becomes a broken heart.
Range voting
Participants can rate options with points from a given interval.
Minimum
Defines the minimum number of points that a participant must award.
Maximum
Defines the maximum number of points a participant may award.
Ranked voting
Ranking Votes are only possible in PollUnits with the type »Survey«. Voters select options by assigning them a personal ranking
Star rating
Depending on the configuration, voters can rate options with 0-10 stars.
Stars per option / image
Defines the number of stars that voters can give to a single option / image.
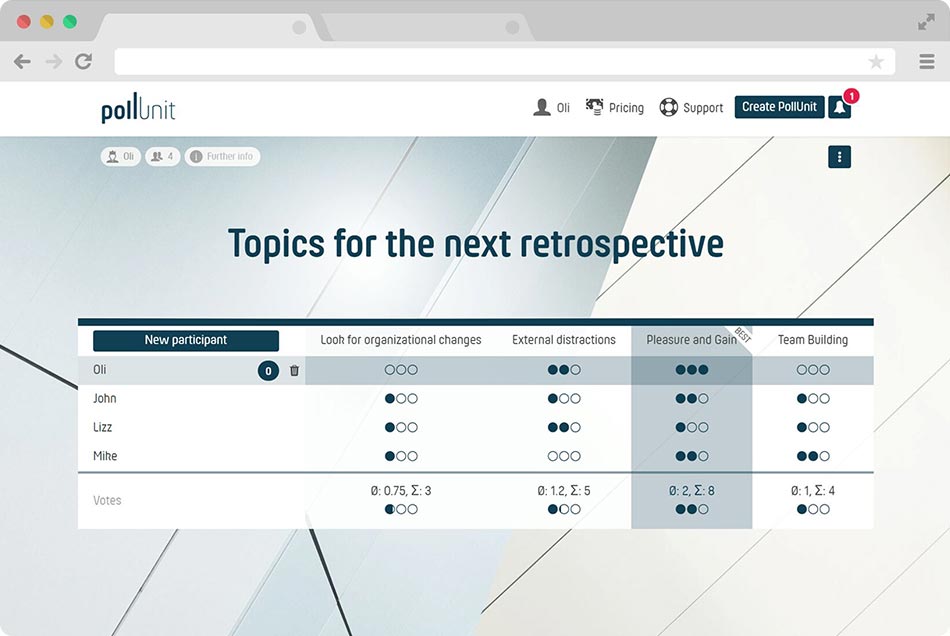
Dot-Voting
Dot Voting is a method to evaluate ideas and to prioritize selections and decisions in a group. And this is how it works:
- Each participant receives a fixed number of points
- Each participant distributes his points to the options
- The option with the most points wins
With the voting target »lowest resistance« you can flip the rating and the option wins with the least negative votes.
Dots per option / image
Defines the number of points that a voter can give to a single option / image.
Dots per person voting
Defines the number of points that a voter can allocate to the options.
Dot Icon
You can change the dot symbol to an other icon. Changing the icon will not affect the dot voting functionality. This way you can create for example a heart or star vote and limit the total amount of hearts or stars.
Emoji-Voting
With the help of smileys the user can vote.
Number of emojis
The number of emojis determines how many emojis people can vote with and how strongly they can express their emotions. Positive and negative votes are weighted particularly highly here.
| Icon | Meaning | Value |
|---|---|---|
|
|
Very satisfied | 3 |
|
|
Satisfied | 1 |
|
|
Neutral | 0 |
|
|
Dissatisfied | -1 |
|
|
Very dissatisfied | -3 |
Superlative-Voting
A voter has to decide which option is the best. In combination with our voting categories voters can choose a favorite per category. You should name your voting categories in superlative. For example: Most Creative, Funniest, Best Outfit ...
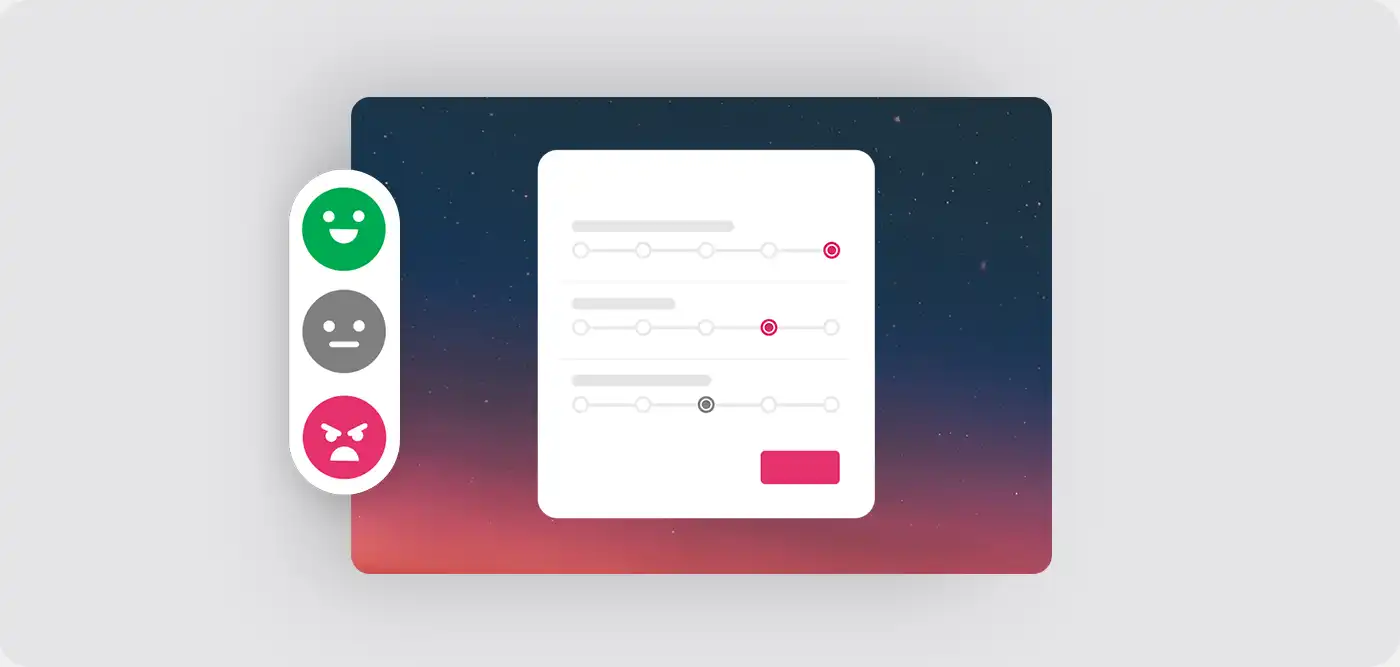
Matrix / Scale
Matrix votes are only possible in PollUnits with the type »survey«. Popular matrices / scales can be easily selected. In the following step you can add questions. These will be displayed in rows.
Satisfaction
Hate / Love
Importance
Likelihood
Agreement
Bad / Good
Frequency
Yes / no
Custom matrix / scale
You can also create your own matrices / scales where you can define the labels of your answers and the default answer.
Categories
Submission Categories
With submission categories, you can divide your contests into different themes or genres. Participants select an appropriate category when uploading their media, ensuring that all submissions are sorted into the right group.
Only submissions within the same submission category compete against each other. Each submission category has its own winners.
Voting Categories
Voting categories allow media to be evaluated based on different criteria, independently of a fixed submission category. Each submission is judged across all categories, e.g., based on »Originality« or »Quality«.
This means a single submission can score in multiple categories, and each voting category can have its own winners. This system enables a diverse and differentiated evaluation of the submissions.
Average calculation
Voters per option
Only voters who have voted for an option / image are taken into account: For example, if there are 5 participants and 3 of them have rated an option / image with 5 stars, the average is 5.
All voters
All voters are taken into account: For example, if there are 5 voters and 3 of them have rated an option / image with 5 stars, the average is 3.
Image settings
File types
For PollUnits with images or other files the following file formats are supported: All common image formats, pdf, zip, docx, xlsx, pptx, txt and mp3
Hide file / image title
Hides the title or file name in the participant link. The name is visible in the admin link and the evaluation.
Settings only accessible for file and image votings
You can activate this setting in wizard step 2.
Minimum resolution
If the pixel requirement is not met, participation will not be permitted. The following table shows the printability using a 3:2 aspect ratio.
| Resolution |
15 x 10
cm |
30 x 20
cm |
60 x 40
cm |
80 x 60
cm |
|---|---|---|---|---|
|
2 Mpx
1732 x 1155 |
||||
|
4 Mpx
2449 x 1633 |
||||
|
6 Mpx
3000 x 2000 |
||||
|
8 Mpx
3464 x 2309 |
||||
|
12 Mpx
4242 x 2828 |
||||
|
16 Mpx
4898 x 3265 |
||||
|
24 Mpx
6000 x 4000 |
Image orientation
Only entries that correspond to the specified image orientation will be accepted. You can choose between portrait format (portrait) and landscape format (landscape).
File size specifications
If the file size is too small or too large, the file will not be accepted and the uploading person will be informed.
Publish camera settings
If a photo or image is uploaded to your PollUnit, we read the exif metadata (Exchangeable Image File Format) and make it available to the administrators. If you publish the meta data, your participants will have access to the following camera settings:
Camera, focal length, ISO, flash, aperture and shutter speed.
The data shows how the camera has exposed an image. The data can be used to determine whether these settings are appropriate.
The specification of exif data in files is optional and can only be displayed if it exists.
Video settings
File types
All common video formats such as mp4, mpg, avi, m4v, webm, flv are supported in video competitions.
Hide video title
Hides the title or file name in the participation link. The name remains visible in the admin link and in the evaluation.
Setting only for video competitions
The option can be activated in Wizard Step 2.
Advanced settings
The advanced settings can be found in the wizard Step 4 (Advanced)
Allow voting
If this option is deselected, voting in your PollUnit is not possible. Voting can be activated at any time. In combination with »Allow new options«, you can use PollUnit to collect options and photos before opening the poll for voting.
Allow participation
If this option is deselected, visitors can no longer register in the PollUnit. This option is only available in PollUnit tables and the Advent calendar.
Voters must provide a name
People without a PollUnit account must enter a name before participating.
If this option is disabled, participants without an account automatically receive an anonymous name such as »Anonymous-12345«. People with a PollUnit account continue to appear with their chosen profile name.
If participants with a PollUnit account should also be anonymized, the option »Anonymize voters / participants« can additionally be enabled.
Anonymize voters / participants
All names of the voters are anonymized. Instead of a name, everyone is given a random anonymous name, e.g. Anonymous-12345678. Even admins can no longer see the real names. As soon as this setting is activated and voters have already voted, you can no longer undo this setting.
Voting start and deadline
Set a start time and/or deadline if you want to allow voting only in a certain period of time. The time you choose is your local time.
Participation Period
Set a start time and/or a deadline if you want to allow participation only within a specific period. The time you choose is your local time.
Voting fee / donation
Set a fee for voting or allow your voters to donate when they cast votes in your PollUnit. If you want your users to choose the amount themselves, you can leave the field empty.
Fee
Set a fee for each person voting.
Donation
Allow donations when voting in your PollUnit. You can set a minimum donation amount.
Sell votes
Allows an option to buy multiple votes.
Name for payment
Give your donation or fee a meaningful name. Your voters will be forwarded to our payment provider Stripe and there they should recognize what they are paying for. E.g. "Voting fee for PollUnit photo contest"
Show images / videos / audio tracks before voting
By default images / videos / audio tracks are hidden for other users, before voting starts. If you want to make them visible before, you can check this setting.
Request additional information from voters
Request any information such as email address, companions, birthday, etc.. Only after entering the information users may vote.
You do not need to create an additional email field here if you choose »Users must confirm their information«.
The information is only visible to the admins of your PollUnit.
Change fields during runtime
Existing voters do not have to fill in new mandatory fields. Deleted fields are no longer included in the evaluation.
Comments
Your PollUnit's participants are allowed to write comments.
Private comments
Comments can be seen only by the administrator, the submitter and the commenters themselves. The general comments section will be disabled. This way other voters will not be influenced by the comments.
If this option is disabled, the comments will be visible to everyone.
This option is only available in photo contests, idea collections and votings.
Allow new options / images / columns
Allows participants depending on your PollUnit type to add new options / images / columns to your PollUnit.
Allow new rows
Allow participants to create new rows.
Allow image series
Allow photographers to upload a sequence of photographs. When judging image series, the judges can consider the collective strength of the series as a whole.
A maximum of 20 images per photo series can be submitted.
Maximum number of images per series
Defines how many images can be submitted per image series. If the field is left empty, 20 images are allowed.
Limit number of voting options / images / columns per participant
Allow only a certain number of voting options / pictures / columns per participant. For example, in a photo contest you can make sure that a participant can only submit one picture or image series. Under »Restrict voting« you can control that multiple entries are prevented.
For multiple submission categories, this limit applies to the entire PollUnit, not per category.
Disallow voting of own options / images / columns
With this setting, users are not able to vote for their own submitted option / photo / video / idea.
Submission start and deadline
Set a start time and/or deadline if you want to allow submission only in a certain period of time. The time you choose is your local time.
Submission fee / Donation
Set a fee for each submissions or allow your submitters to donate when they submit to your PollUnit. If you want your users to choose the amount themselves, you can leave the field empty.
Fee
Set a fee for each submission in your PollUnit.
Donation
Allow your submitters to donate when they submit to your PollUnit. You can set a minimum donation value.
Name for payment
Give your donation or fee a meaningful name. Your participants will be redirected to our payment provider Stripe and there they should recognize what they are paying for, e.g. »PollUnit photo contest entry fee«
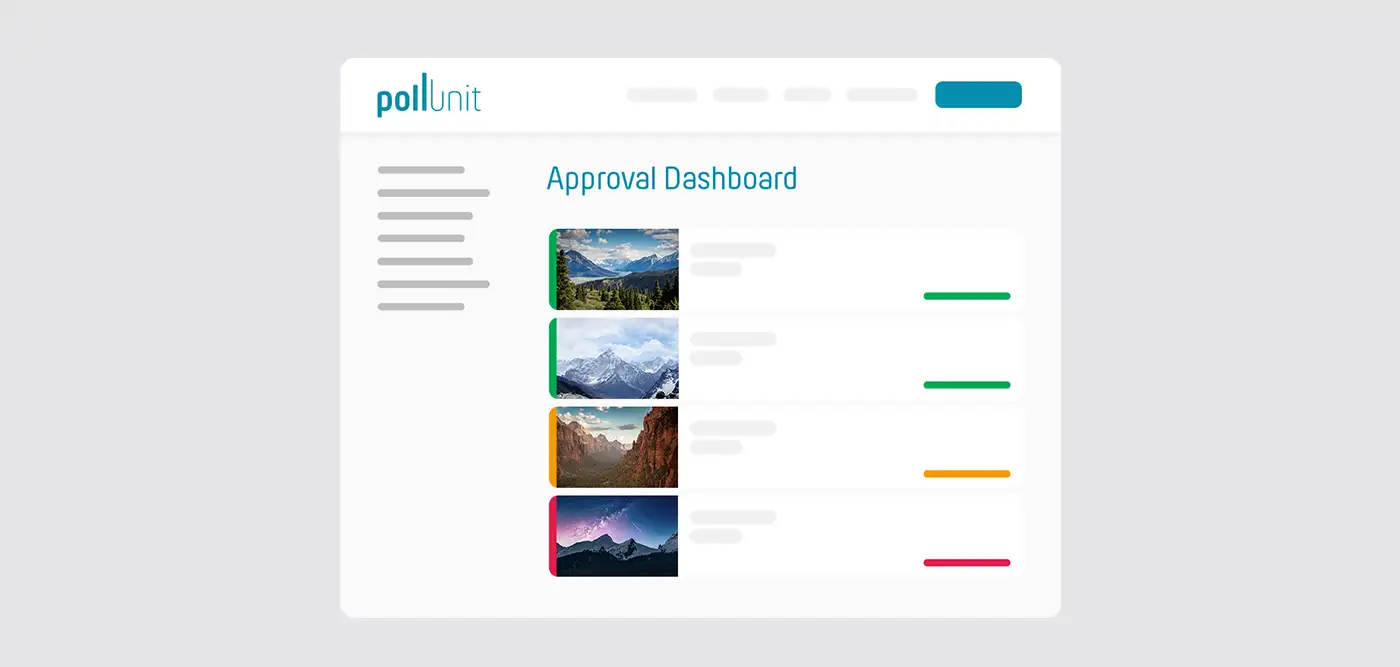
Approval required
Optionally, participants' options must be approved by an admin before they are published. The options will only become visible to the participants after the admin has given his consent.
As admin you get access to a submission approval dashboard.
Creators / submitters must specify names
Creators / submitters must give their name. When this option is unchecked, the names for all are hidden.
Description must be entered
To submit an image, a description must be entered. Descriptions must be enabled in step 1. This option is only available in photo contests.
Request confirmation email (double opt-in)
In order to confirm the information entered, the email address of the user is also requested. An email is sent to the user with the request to confirm the entered information.
This can be used, for example, to get permission from the user to send marketing emails. By confirming this information by email, this step is also privacy compliant.
Request additional option / idea / image / column creator information
Request any information such as email address, copyright information, artist name, etc.. Only after entering the information users may add options.
You do not need to create an additional email field here if you choose »Users must confirm their information«.
The information is only visible to the admins of your PollUnit.
Public field
If a field is marked as public, the entries are visible for all visitors.
Mandatory field
If a field is marked as mandatory, the participant must fill in this field.
Change fields during runtime
Existing participants do not have to fill in new mandatory fields. Deleted fields are no longer included in the evaluation.
Collect URL parameters
By appending URL parameters to the PollUnit link, data can be transmitted to PollUnit and participants can be tracked. You can store any key-value pairs with your participations. This data is then available in the evaluation as well as in the export. For example, you can append a unique identifier or an email address to track who has responded, who has voted, or who has submitted options.
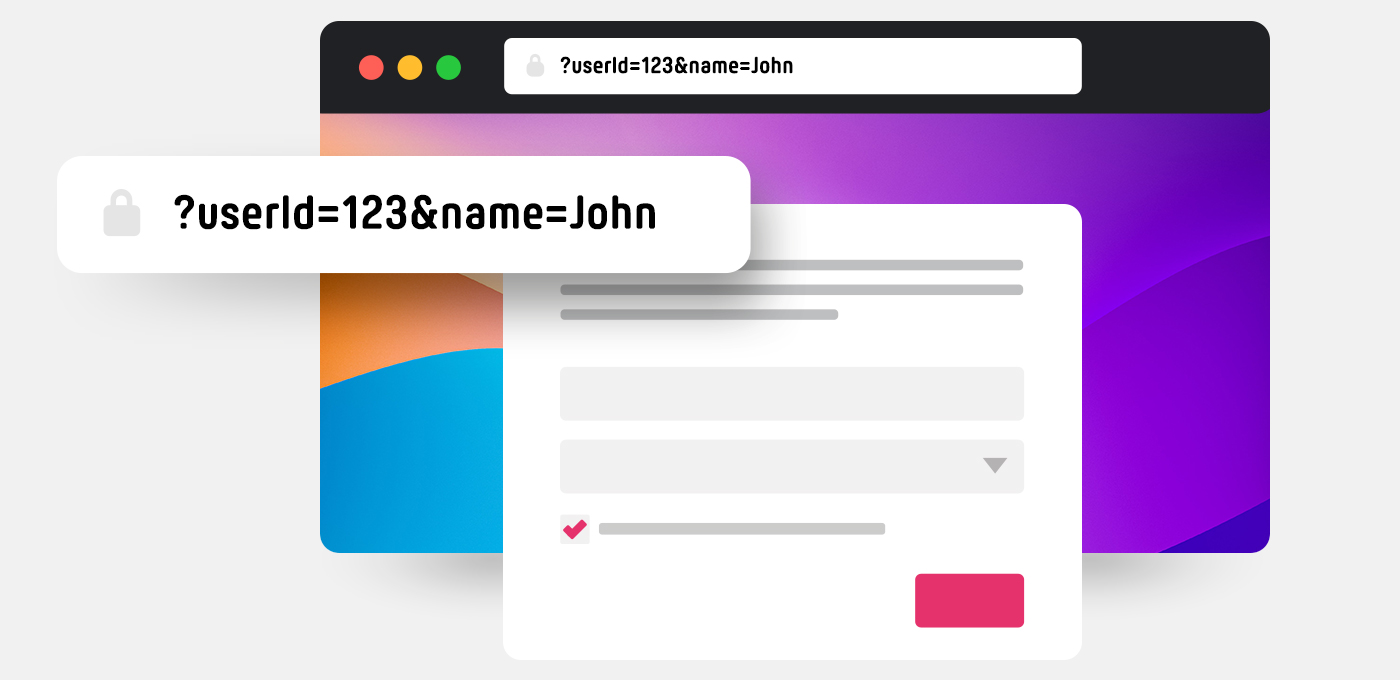
How to append URL parameters?
You can appended key value pairs at the end of your PollUnit URL in the format of ?key1=value1&key2=value2. The »?« indicates the beginning of the URL query string. Any subsequent parameter is separated by an »&« symbol.
If you want to store the ID »123« and email »some@email.com« to a participant in the PollUnit URL »https://pollunit.com/polls/abcdefg» you need to append the parameters like this: https://pollunit.com/polls/abcdefg?id=123&email=some@email.com.
Do not forget to allowlist »id« and »email« in the advanced step.
Sensitive data
Do not put any sensitive information in the URL parameters. URLS can be easily read and intercepted by others. For example when users do not clear their browser history.
Use only URL safe keys and values
For your keys and values you are allowed to use any alphanumeric character as well as »-« and »_« (A-Z, a-z, 0-9, -, _).
Values are alsow allowed to contain special characters like spaces, ampersands and certain punctuation marks. These need to be modified for use in a URL. You need a URL safe encoding, also known as percent-encoding.
For example, a space is percent-encoded as %20, the »&« symbol is encoded as %26. If you want to store the user name »John Doe« you need to append ?user_name=John%20Doe.
Forwarding URL Parameters
When this option is enabled, the URL parameters you provide will also be appended to the buttons on the thank-you pages (if configured). This allows for the complete tracking of the participation process.
Parameters with collected values
URL parameters that have already collected values from participants cannot be removed. This ensures that the collected data remains linked to its corresponding parameter definition.
Vote once a day
Allows participants to vote once per day. If a participant has already voted on one day, they are prevented from voting again. This option is only available if the vote type is a Boolean type. In other words, if participants can vote with a simple approval, for example with a like, a heart or a tick.
Custom PollUnit URL
For example: pollunit.com/polls/CUSTOM.
Allowed characters
A-Z, a-z, 0-9, - and _
Restrict voting
Secure your votings against multiple participations by various security measures.
Allow multiple participations with one device
Shows a button in your poll, which can be used to start a new participation under a different name.
Allow only one participation
By setting a Cookie when voted, no other participant can vote from the same browser. Caution! Cookies can easily be deleted by participants. Therefore, this option offers very little security.
IP Security Check
After voting the IP address of the participant will be blocked for further votes. Attention! In many companies and universities, employees have the same IP address, so only one of them could vote. The IP address can also be manipulated. Therefore this option offers only a low security.
PollUnit account required
When »PollUnit account required« is selected, only users, who are registered at PollUnit, are allow to participate in this PollUnit.
Invitation required
When »Invitation required« is selected, only users who have received an invitation can participate in this PollUnit. In this case users do not need a PollUnit account. The invitation links can be automatically sent to provided email addresses by PollUnit. You can also send these manually so that you can e.g. share them via WhatsApp or other messengers.
External authentication provider
Access can be limited to accounts authenticated via external providers like Facebook, Google, or your own SSO solution, ensuring exclusive participation, e.g., for employees within your company.
Google, Facebook, and Github
Participants can log in using their Google, Facebook, or Github accounts without the need to create separate credentials. The identity of participants is verified through the authentication process with Google, Facebook, or Github. This makes it more challenging for individuals to create multiple accounts and thus enables prevention of multiple participations.
Allow access only with organization's SSO
If you create a PollUnit within an organization, which has an SSO provider configured, you can allow access to only users who are authenticated through this provider.
Request Email Confirmation
If email confirmation is required, participants are asked to enter their email address. Subsequently, PollUnit sends an email with a confirmation link. Participation is only possible after confirmation.
Allow All Domains
Participants can enter any email address. If a person has access to multiple email addresses, they can theoretically generate one participation for each email address.
Allow Only Specific Domains
Participants must use an email address with one of the allowed domains, which can significantly enhance security. For example, if the domain is my-domain.com, only email addresses ending with @my-domain.com can be entered. This can ensure that only individuals from the same company can participate.
Invitation and PollUnit account required
When »Invitation and PollUnit account required« is selected, only users who have received an invitation can participate in this PollUnit (Users must have a PollUnit account or have to register when they receive the invitation).
Jury mode
In the jury mode, an invitation is required to vote. In contrast to the public mode, participants in the jury mode are not informed that an invitation is required for voting.
Apply restriction also to visitors / submitters
With »Apply restriction also to visitors / submitters« users can only access the PollUnit with the selected security setting. Otherwise, the access restriction applies only to voting users.
Private »Hide Votes«
In a private PollUnit with hidden votes, participants cannot see other participants' votes. However the creator can view the result at any time.
Hide Submissions
When submissions are hidden, participants can only see their own entries. This is ideal for collecting content or files privately. Admins, however, retain full access to all submissions at all times.
Public Voting
Please note that hidden submissions and public voting cannot be active simultaneously. If you use the »Start Voting« feature, the »hidden« setting will be automatically deactivated, making all submissions visible to voters.
Jury Voting
In Jury Mode, you can keep submissions hidden from the general public and other participants. Invited judges will still be able to see and evaluate all entries.
Hide results
Publishing results can be deactivated, but the person who created the PollUnit can see them at any time. When the results are published, the participants can also view the results. This option can also be adjusted only when closing/terminating the PollUnit.
Keep in mind that if personal data is requested, it will also be published. will be published.
Hide award of the best choice
Usually the best choice is highlighted during the voting. You can disable this so that participants are not influenced by it.
Private »Hide voters«
In a private PollUnit with hidden voters, participants cannot see voters. Even after the PollUnit is closed, the voters remain hidden. However the creator can view the result at any time
Limited evaluation
The hidden voters of a PollUnit can be seen in the evaluation only by the creator.
Limited Activity Log
If the voters are hidden, their votes will not appear in the activity log.
Hide name of creator
Hides the name of the creator in the participant link. The name is visible in the admin link and the evaluation.
Hide name of idea creator
Hides the name of the idea creator in the participant link. The name is visible in the admin link and the evaluation.
Hide name of submitting person
Hides the name of the submitting person in the participation link. The name is visible in the admin link and in the evaluation.
Hide name of the person editing
The name of the person editing the table will be hidden in the participation link. The name is visible in the admin link and in the evaluation.
Hide tags
Hides all tags from participants. Only admins can see tags. Tags can be used, for example, to mark options.
Randomize options / images / columns order
To avoid order bias, you can shuffle the options / images / columns for each user.
Single select
Participants have to decide for one option. If they assign another vote, the previous one is removed. For multiple submission categories, this applies per category, meaning one vote can be cast per category.
Contact and imprint
If not specified, the name of the creator will be used. The publisher is displayed in your PollUnit header as well as in emails. If you add a imprint or terms, a link at the end of your PollUnit is shown.
Upon entering your contact details, they will be visible to the participants, enabling them to reach out to you directly for any inquiries they may have.
Add terms and conditions
If you enter terms and conditions, a link at the end of your PollUnit is shown. If the opt-in function is activated, the user has to confirm the terms and conditions by checking the checkbox before he can participate. The terms and conditions can be viewed via the checkbox.
Add privacy notice
If you enter a privacy notice, a link at the end of your PollUnit is shown. If the opt-in function is activated, the user has to confirm the privacy notice by checking the checkbox before he can participate. The privacy notice can be viewed via the checkbox.
SEO & Social Media Tags
With the help of Social Meta Tags you can define how your shared PollUnit is displayed in the news feed of Facebook, Twitter, Slack and other social networking sites. You can define a title and a description for each PollUnit. You can also upload a title image.
Recommended size for the title image is 1200 px x 630 px. The title should not exceed 40 characters and the description 300 characters.
You can also enable indexing on search engines. By default, indexing is disabled. By the activation the participation link of your PollUnit will be transmitted to Google and the meta tag »Robots« is set to »index, follow«. When and if a page is indexed depends on the search engine.
Thank You Page for voters
Define a final page with headline, content and link to your own website.
Thank you page for submitters
After a participant submits options, pictures, files or ideas, a thank you page with your texts and links will be displayed.
Limit per option
Control how many participants can vote for the same option. You can only change the limit type if no votes have been cast yet.
No limits
Any number of participants can vote on any option.
Global Limit
Your selected limit describes the number of times each option can be selected. Each option has the same limit.
Individual limits
A unique limit can be defined for each option.
Password protection
Secure your PollUnit! Users can only participate and view the PollUnit's result if they know the password.
White Label
Remove PollUnit Branding
The following will be removed
When visiting the participant link the »powered by« message in the embedded PollUnits and the menu items like prices, help, the »Create PollUnit« button and the footer will be removed. The PollUnit logo can be replaced in the step »Design«.
Hide PollUnit sign up from participants
If the PollUnit registration is hidden for participants, the visitors of your PollUnit can only participate as guest. The functions for which a PollUnit account is necessary can no longer be used.
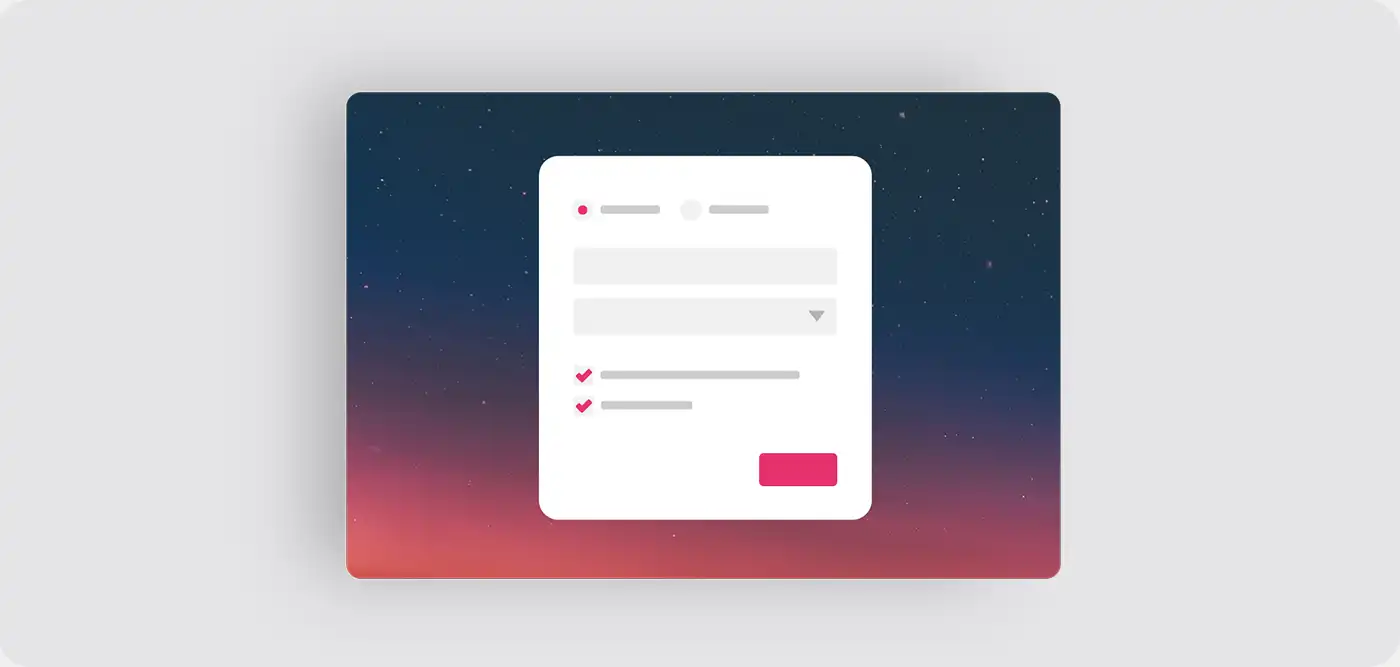
Survey Steps and Types
A PollUnit of the "Survey" type allows you to create a multi-step questionnaire. Various step types are available, each offering different functions.
Query information
Use standard form fields such as text and selection fields to collect simple data.
Text
Creates a text field for short inputs like name, address fields, phone number, etc.
Required field
Can be marked as a required field and must be filled out to proceed to the next step.
Description
If a description is provided, it will be displayed below the field.
Text area (multiline)
Creates a multi-line text field for long inputs.
Required field
Can be marked as a required field and must be filled out to proceed to the next step.
Description
If a description is provided, it will be displayed below the field.
Checkbox
A checkbox is a small box that can be checked or unchecked by clicking. Multiple checkboxes can also be created in a row.
Required field
A checkbox marked as required must be checked to proceed to the next step.
Description
If a description is provided, it will be displayed below the checkbox.
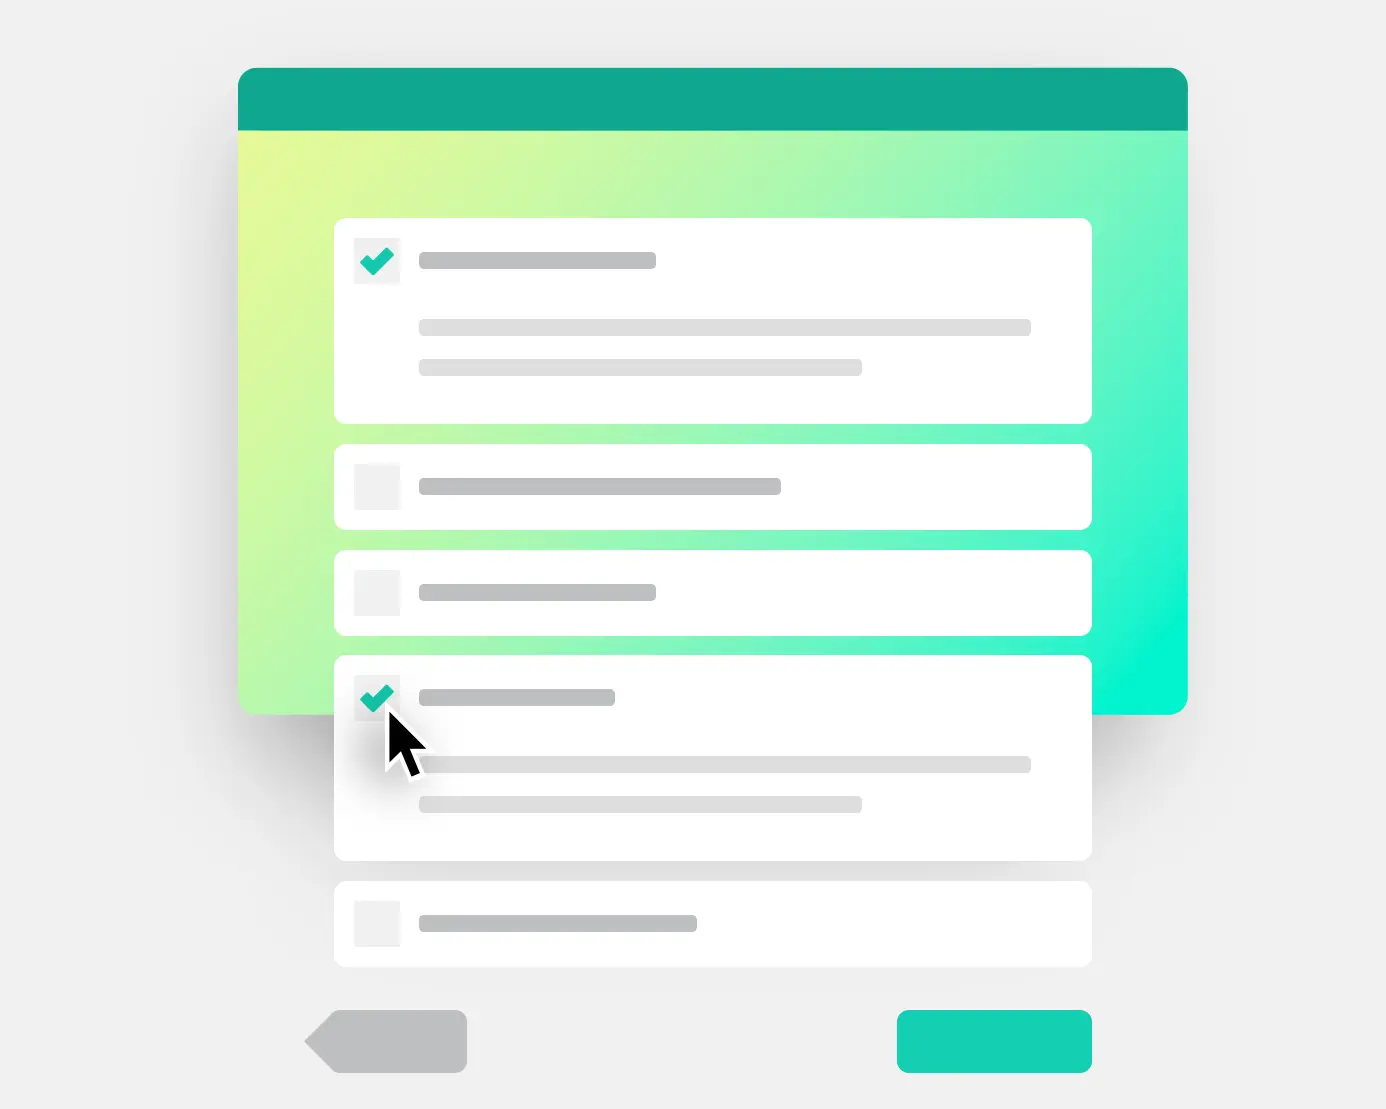
Multiple Choice (Multiple Selection)
Creates multiple checkboxes for multiple selection with a heading. This question type allows users to select multiple predefined answers. Cannot be marked as a required field.
Mandatory field
Can be marked as a mandatory field. At least one checkbox must then be ticked.
Description
If a description is provided, it will be displayed below the checkboxes.
Radio Buttons (Single Selection)
Creates multiple single-selection fields with a heading. Single selection is a question type where participants can choose only one answer from multiple options.
Required field
Can be marked as a required field, requiring one option to be selected.
Description
If a description is provided, it will be displayed below the heading but above the options.
Drop down select
Creates a field where options can be selected from a list.
Required field
Can be marked as a required field, requiring one option to be selected.
Description
If a description is provided, it will be displayed below the field.
Date
Creates a date field where users can enter or select a date from a calendar.
Required field
Can be marked as a required field and must be filled out to proceed to the next step.
Description
If a description is provided, it will be displayed below the field.
Date with Time
Creates a date field where users can enter or select a date with time from a calendar.
Required field
Can be marked as a required field and must be filled out to proceed to the next step.
Description
If a description is provided, it will be displayed below the field.
File Upload
Creates a selection field where a local file can be chosen and uploaded.
Required field
Can be marked as a required field and must be filled out to proceed to the next step.
Description
If a description is provided, it will be displayed below the field.
Creates a text field where an email address can be entered.
Required field
Can be marked as a required field and must be filled out to proceed to the next step.
Description
If a description is provided, it will be displayed below the field.
Number
Creates a text field where whole numbers can be entered. Suitable for all kinds of numbers expressed as integers. Not suitable for phone numbers.
Required field
Can be marked as a required field and must be filled out to proceed to the next step.
Description
If a description is provided, it will be displayed below the field.
Float number
Creates a text field where decimal and whole numbers can be entered.
Required field
Can be marked as a required field and must be filled out to proceed to the next step.
Description
If a description is provided, it will be displayed below the field.
URL
Creates a text field where a URL like https://pollunit.com can be entered.
Required field
Can be marked as a required field and must be filled out to proceed to the next step.
Description
If a description is provided, it will be displayed below the field.
Inform participants
This step is solely for providing participants with free text information.
Submit rating
You ask a question or display an image and let your users rate it. Choose from different voting types.

Vote in Matrix / Scale
Create a matrix / scale and ask multiple questions. Participants can select one option per question.
Select location
Participants can select a location on a map.
Point
Participants can mark a single point.
Route
Participants can draw a line consisting of several points.
Area
Participants can mark an area using multiple points.
Circular area
Participants can mark an area by drawing a circle.
Rectangular area
Participants can mark an area by drawing a rectangle.
Let draw
Ask a question or task and let your participants draw an image in response.

Survey Step Settings
Participants must vote
In the default setting of the survey steps »Rating« and »Matrix«, a selection or rating is optional. However, if you activate the option »Participants must vote«, a selection or rating becomes mandatory.
Evaluation step
By default, in a survey step of the »Rating« type, participants do not need to rate or vote for any options and can skip the step. If you choose »Participants must vote«, the rating step becomes mandatory.
For simple ratings using heart, thumbs up, checkboxes, or voting in superlatives, only one option needs to be rated or selected. For ratings with multiple selections per option, such as voting with stars, points, or scales, each option must be rated.
Matrix step
In the standard version of a survey step of the »Matrix« type, all statements are assigned a preset value. Participants can accept this value or change it if necessary.
However, if the option »Participants must vote« is activated, the default setting is removed. In this case, participants must actively make a selection for each statement.
Drawing/signature step
Participants must draw something. An empty sheet cannot be submitted.
Step for marking places, areas, and routes
Participants must mark at least one point or area.
Addons
Addons allow you to add more fields to your options. In order to activate addons, you have to check the desired addon in the Scheme settings in the Wizard Step 1 (PollUnit). This additional information is visible to all visitors.
Subtitle
If enabled, a free text can be added to the options in your PollUnit.
Description
If enabled, a text (multiline) can be added to the options / images. Adding descriptions is only possible via the edit functions in the option context menu or when creating an option in your PollUnit (but not in the wizard).
Link
If enabled, a link can be added to the options in your PollUnit. Links consist of a URL and a title.
Attachments
When activated, a file attachment can be added to the options of your PollUnit. A file attachment consists of a file and a title.
Admin
Besides editing a PollUnit, you can use as admin further functions to manage your online group decision.
Close PollUnit
When you close your PollUnit, it is no longer possible to participate. When you close your PollUnit you can set different visibility and notification settings. To close your PollUnit you have to visit it via the admin link.
Delete options
To delete content like voting options, images or columns, visit the admin link of your PollUnit and click on the context menu (three dots) of the respective content and select »Delete«.
Delete comments
As admin, you can also delete comments from other participants. To delete a comment, visit the Adminlink of your PollUnit and click on the delete icon on the corresponding comment.
We have implemented this feature to allow the owners of PollUnits to delete inappropriate or abusive comments. For the most transparent group decision, the deletion of a comment is saved in the Activity Log of your PollUnit.
Deleting comments from others is a premium feature.
Delete votes
As admin, you can delete participants from your PollUnit. To remove a participant from your group decision, visit the Adminlink of your PollUnit and click the delete icon next to the user's name.
We have implemented this feature to allow the owners of PollUnits to delete duplicate and unauthorized votes. To make group decisions as transparent as possible, deleting voices is stored in the Activity Log of your PollUnit.
Deleting participants and theire votes is a premium feature.
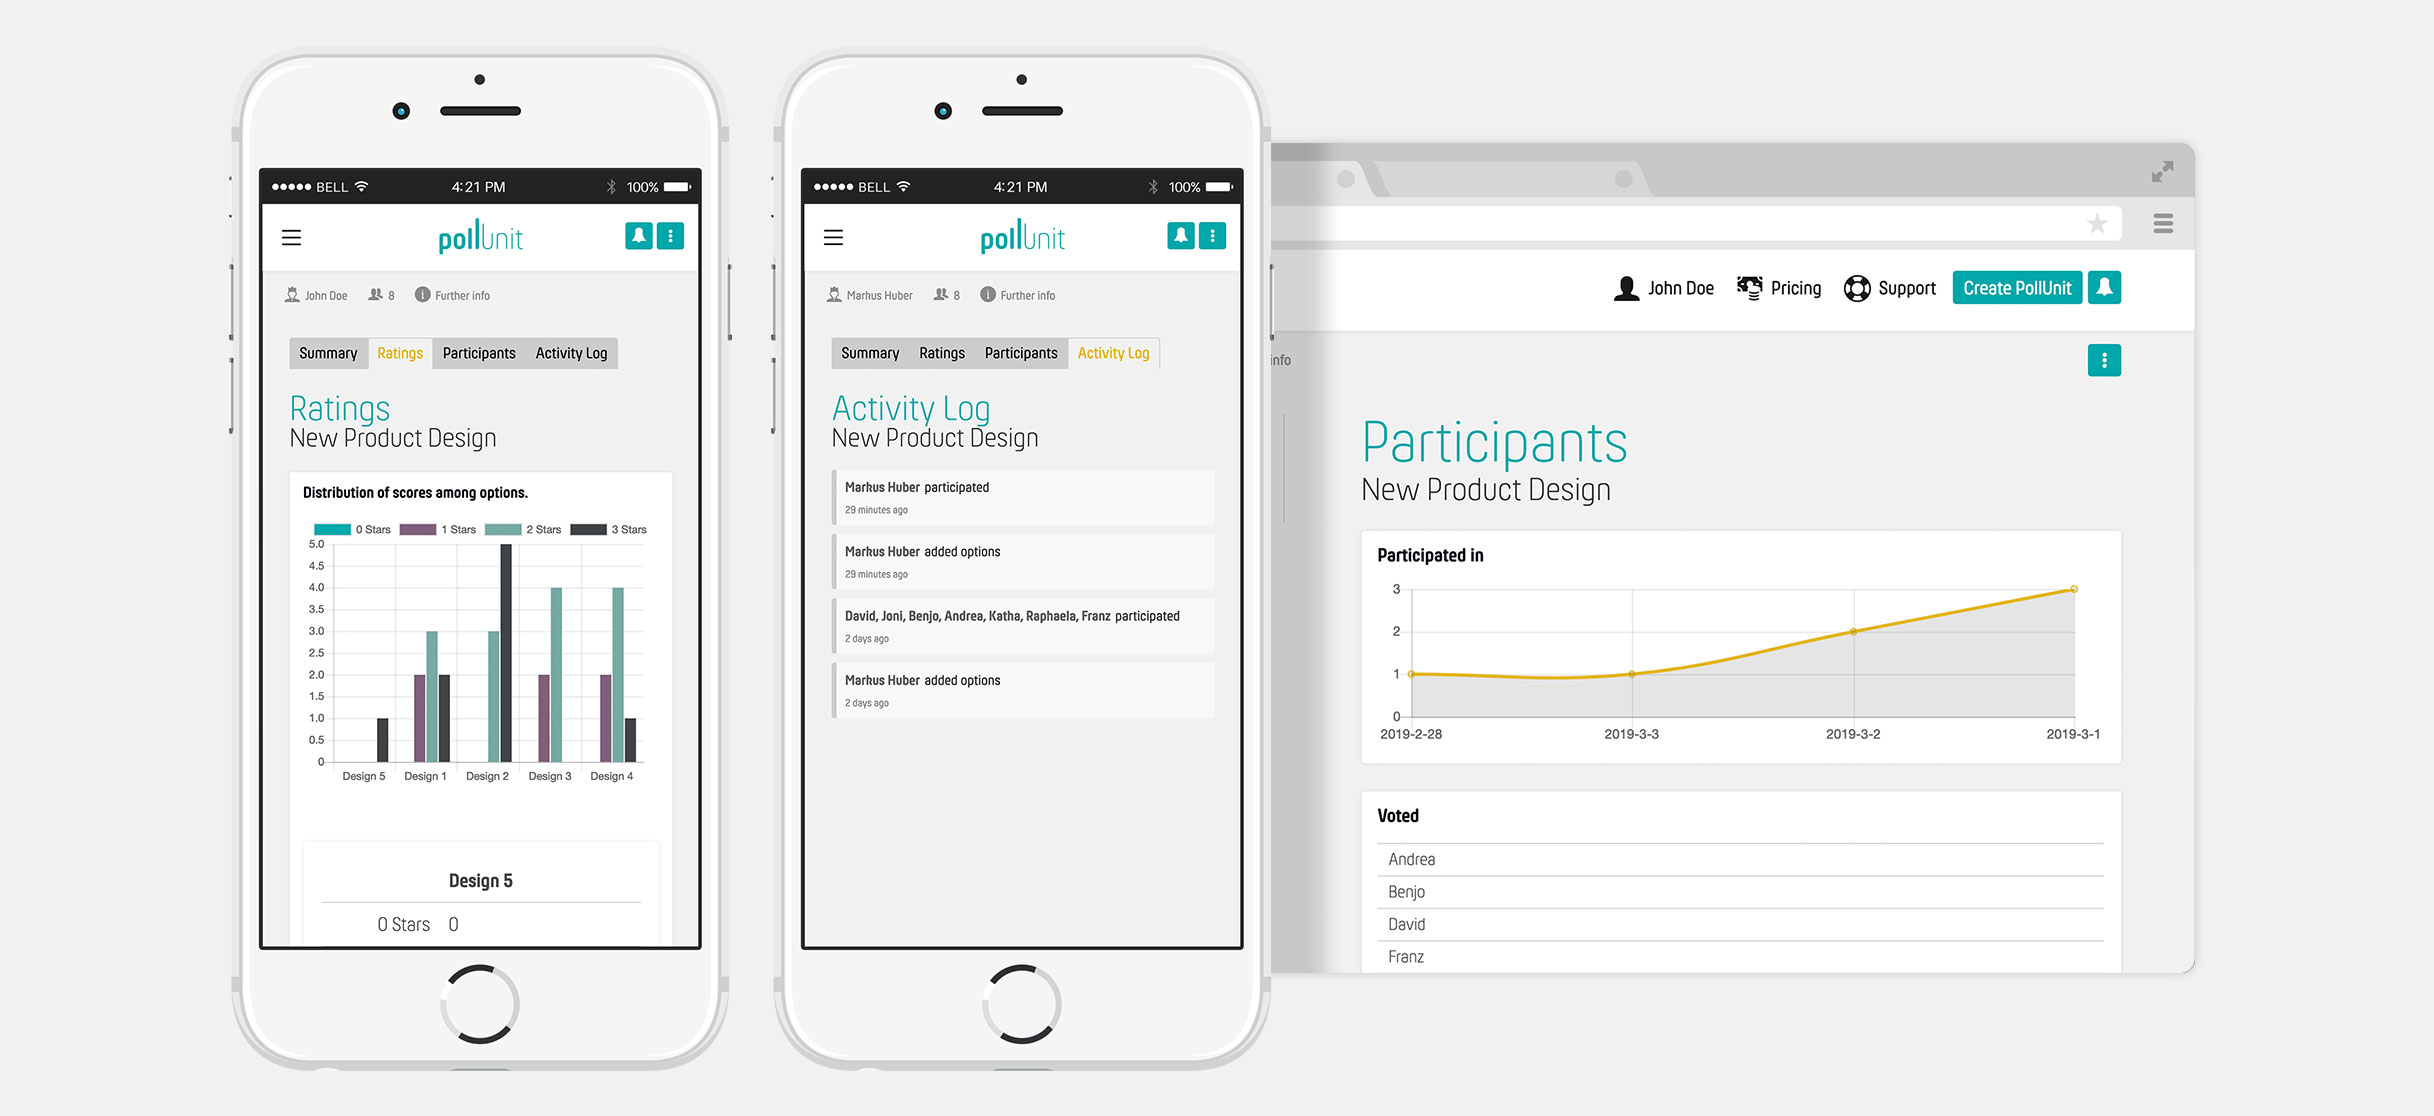
Evaluation
Depending on the PollUnit type, different evaluation tools are available.
Evaluate PollUnit Survey
If you visit the admin link of your survey, you will get a summarized evaluation of all fields and questions per step. You can navigate through the questionnaire via »Next« and »Back«. Via the context menu (three dots) of your survey you will get to further evaluation data. Here you will also find the data of all participants.

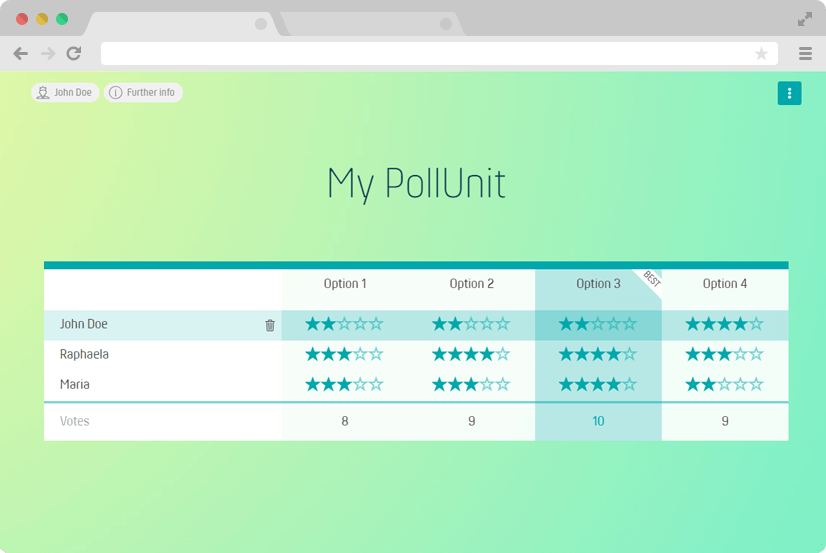
Evaluate PollUnit Voting
To get to the evaluation open the context menu of your PollUnit and click on »Evaluation«. You will get an overview of the options as well as your participants. If you have used the invite function, you will also see which users have not yet voted.
Evaluation of a single option
To get an overview of a single option, click on the corresponding option under Options in the evaluation. A list with the participants is displayed. You get an overview of who votes for this option and who does not.
Export PollUnit as CSV and Excel
As an admin of a PollUnit, you can export the participants and their votes as CSV and Excel. You can open and evaluate this file in the office program of your choice (such as Open Office, Excel, ...).
Batch Download all Submission files
Via the export function in the context menu as well as in the evaluation of your PollUnit you will find the bulk download. With this function you can download all submitted or uploaded files and pictures as zip.
Enriched file name (recommended)
In most cases, uploaders do not provide a readable name. To ensure clarity, we automatically generate a file name enriched with available metadata. The file name format may include the ID, Sub ID (if it is part of an image series), submitter’s name, and title.
Include original file name
The file name format includes the ID, Sub ID, and the original file name.
Fraud Bot
The PollUnit Fraud Bot is an AI that helps to detect fraudulent multiple votes. It is an alternative to our polls that require an invitation or a one-time code and thus offer the highest level of security.
After the calculation, admins can see which voters are suspicious. The votes of the suspicious voters can then be deleted.
Visitor Analysis
Visitor analysis allows admins to better understand the behavior of their users, optimize content and user experiences, and tailor marketing strategies accordingly. Visitors include all people who access a PollUnit, not just those who vote or submit entries. This data is stored anonymously and does not allow conclusions to be drawn about individual visitors.
Device Usage
Device usage shows which types of devices visitors are using. This includes desktop, mobile, and tablet devices.
Browser Usage
Browser usage shows which browsers visitors are using. For example, browsers like Chrome, Safari, and Firefox.
Platform Usage
Platform usage shows which operating systems visitors are using. For example, operating systems like Windows, macOS, or Android.
Bulk Actions
With bulk actions, you can select multiple objects at once and apply an action to all selected items.
This feature is available, for example, when evaluating options, music, image and video submissions, voters, and comments.
To select objects, click them individually or use lasso selection to mark several at once. Hold down the Shift key to select a range of items, or use Command (Mac) or Ctrl (Windows) to add items to your current selection – just like in Finder or Explorer.
Archive options
You can archive voting options. They will then no longer appear in the voting and will not be considered in the evaluation.
Archived options are only visible in Evaluation -> Options / Images / Videos / Audio tracks / Ideas and can be restored there.
Administation, Account
As a registered user, you have some advantages with PollUnit that we can not make accessible to anonymous users. When logged in, you will see your name in the main menu. Under this menu item you will find the links to your PollUnits, Themes, Logos and your Account Settings.
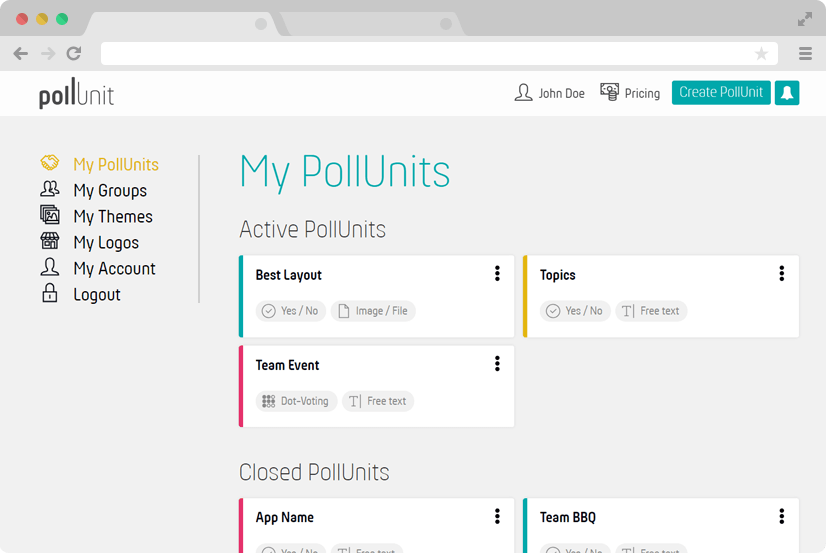
My PollUnits
Here is a list of PolUnits you can access. These are PollUnits you have created, but also polls / surveys where you have participated.
For additional options open the context menu by clicking the three dots. You find following functions:
Participant Link
This is the link to your PollUnit.
Admin Link
This is the administration link for your PollUnit. Please do not share this link with anyone who shouldn't be able to edit or delete your PollUnit. If you want to use all PollUnit features collaboratively, you might consider creating an organization.
Edit PollUnit
By clicking edit you can get to the Wizard of your PollUnit.
Clone PollUnit
This means that your voting / survey with all its options will be cloned to a new PollUnit. You can then customize and re-vote for it.
Share
Here you can share your PollUnit via different social media such as Facebook, WhatsApp, Twitter etc.
Embed PollUnit
You can embed a PollUnit in your website. To do this, you have to approve the host of your website here. We also provide you with a small piece of code to quickly add the voting / survey to your website.
Excel and CSV Export
By exporting your PollUnit as XLSX or CSV you can save the data on your computer and e.g. edit it with Excel.
Close PollUnit
This closes your PollUnit. Participation is then no longer possible. The votes of the participants of a private PollUnit become visible.
Delete all participations
This removes all votes of all participants. You can clear your PollUnit. Deleting entries is shown in the activity log.
Delete PollUnit
This will delete your PollUnit and all data belonging to this poll.
My Groups
Here you can create groups and teams. A group consists of a list of e-mail addresses. You can select these groups in the »Invitations« step and automatically send invitations to your PollUnit. Ideal for recurring votings and surveys for your friends, family or colleagues.
To manage groups you need a premium account.
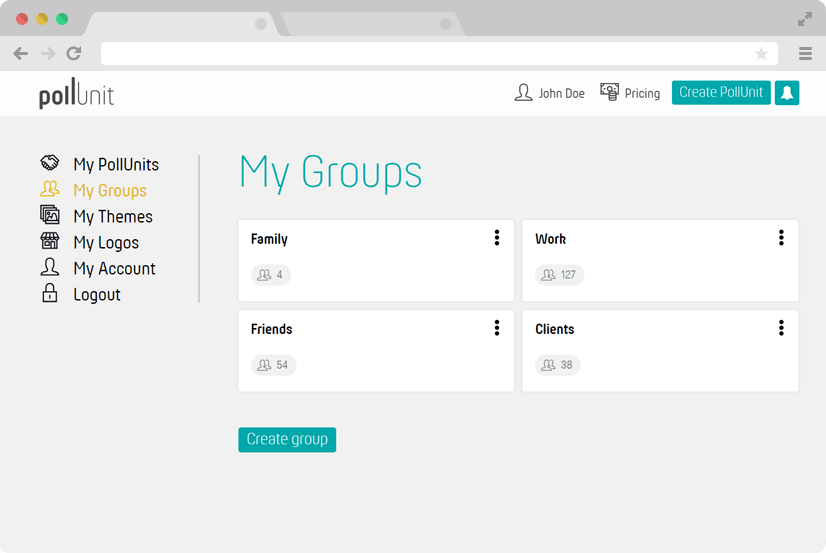
Create new groups
By clicking "Create new group" you can create a new group. You can manage an unlimited amount of groups.
Edit group
Open the context menu and click edit to add or remove group members.
Delete group
Open the context menu and click delete to delete your group.
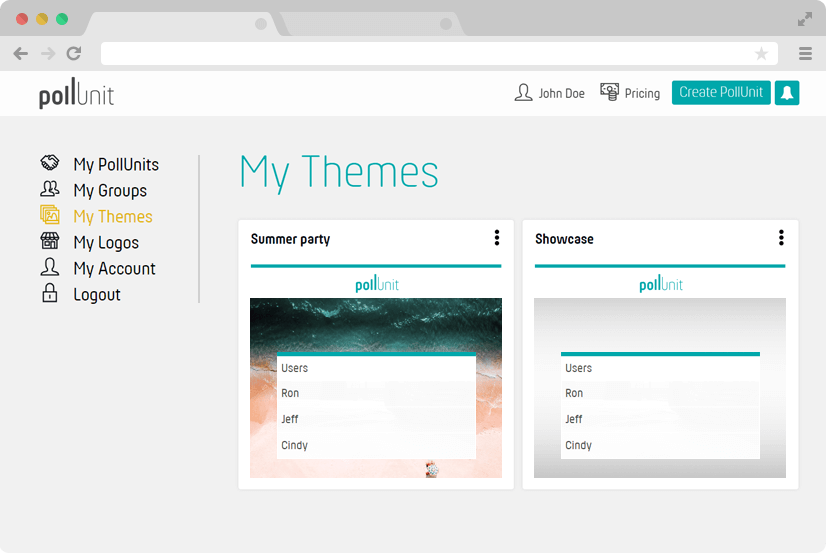
My Themes
Here you can manage your own themes. A theme consists of a background graphic and a color scheme. You can choose this when creating your PollUnit in the Wizard Step 3 (Design).
Create new theme
By clicking »Create new theme« you can create your own theme.
Edit theme
Open the context menu and click edit to change your theme.
Define master theme
In the context menu you can make one of your themes the master theme. All your newly created PollUnits will be initialized with this theme.
Custom CSS
With custom CSS (Cascading Style Sheet) declarations you can override PollUnit's styles and make customizations that are not possible with our default theme settings.
Please note, PollUnit is under continuous development. Changes made here may be invalidated by PollUnit updates.
Delete theme
Open the context menu and click delete to delete your PollUnit and all participations.
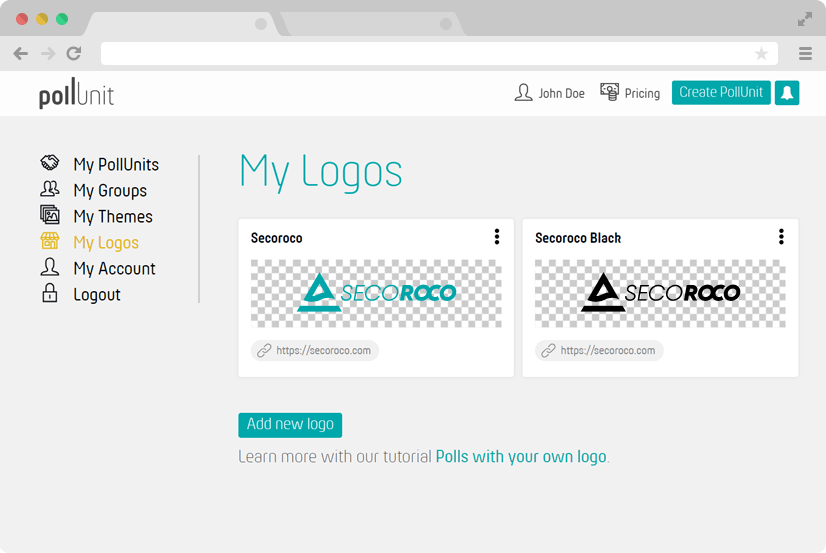
My Logos
Here you can create your own logos. You can choose this when creating your PollUnit in the Wizard Step 3 (Design).
Create new logo
By clicking "Create new logo" you can upload your own logo.
Edit logo
Open the context menu and click edit to reupload your logo or to change the link to your landing page.
Define master logo
In the context menu you can make one of your logos the master logo. All your newly created PollUnits will be initialized with this logo.
Delete logo
Open the context menu and click delete to delete your logo.
My tags
Here you can create tags. You can add them to your PollUnits or mark options in in your PollUnits. Tags can only be assigned by administrators but can be seen by all participants. In the »Advanced« step, when creating a PollUnit, you can hide the tags from participants.
My Account
Here you can edit your personal data such as name, email, password and language.
You can also delete your account here. By deleting your account, all your PollUnits, votes, themes, logos and premium purchases will be deleted. You can not undo this!
My Organizations
With organizations you can define employees an coworkers Members of your organization can manage PollUnits of the organization. So you can automatically pass on the administration and access rights to your polls and create, monitor and evaluate polls in the team.
The number of allowed organizations and coworkers depends on your PollUnit package.
Organizations belong to the business functions of PollUnit.
Wallets
You may charge your participants a fee or a donation for their submission. Create your own wallet to receive payments through the service provider Stripe.
Calendar synchronization
You can synchronize your polls with your calendar using ICS feeds. Synchronization can be set either for individual PollUnit votings, for all votings of a user or for all votings of an organization.
In all three cases an ICS feed URL will be created. You can use this URL to either download a file that contains the corresponding dates. Or you can use this URL to permanently synchronize the events in a calendar application.
Attention: with most applications changes in your appointment poll are synchronized with a delay.
Single appointments
To synchronize only a single poll with your calendar, click »Calendar Sync« at the top of your poll's information bar. The popup that opens will give you a URL to the ICS feed, or you can download an ics file.
Own date polls
If you want to synchronize all polls of your account with your calendar, you can do this under »My Account«.
Under the item »My calendar« you can create a feed for your account. Do not share this URL with anyone, because the calendar file contains all links to your event polls.
Via the context menu you can reset an existing ICS feed to generate a new URL or you can remove the feed.
Organization's date polls
You can also provide the dates of all organization's date polls via an ICS feed. You create these feed in the context menu of each organization at »My Organizations«.
In the ICS feed's context menu you can remove or reset existing feeds to generate a new URL.
Single-Sign-On
PollUnit offers Single-Sign-On (SSO) with SAML to help companies to re-use their existing authentication solution for authenticating users in PollUnit.
Organization SSO slug
An »Organization SSO slug« uniquely identifies your organization. If you don't know the slug of your organization, please ask the PollUnit admin within your company.
Configure Single-Sign-On in PollUnit
Each organization in PollUnit can configure its own SSO. For this an organization has to pick a unique organization identifier the so called »Organization SSO slug«. The rest of the configuration should be retrieved from your SSO provider.
Configure Single-Sign-On in your SSO provider
In your SSO provider you have to configure the allowed callback URLs for authentication and logout. For authentication you have to add:
https://pollunit.com/users/saml/auth?sso=your-organization-sso-slug
and for log out:
https://pollunit.com/users/saml/idp_sign_out
AuthnContextClassRef
For most providers this can be left empty. For Azure AD you should enter: urn:oasis:names:tc:SAML:2.0:ac:classes:Password
Attribute Mapping
To create a user in PollUnit with the information provided from an SSO provider, this information has to be mapped to the fields of a user in PollUnit. On the left are the attributes how they are named in the SAML response from your provider. You should look for the »Name« attributes in the »AttributeStatement« of your SAML response.
Share SSO Login link
You can facilitate the log in of your users by sending them a direct link to your SSO login, which looks like the following:
https://pollunit.com/users/sso?slug=your-organization-sso-slug
Missing a feature?
You need more help or you have a feature that could help you and other users make more effective decisions? Feel free to contact us at support@pollunit.com.